
Look, I’ve messed up more pie crusts than I care to admit. But this pie crust recipe changed everything for me. It’s got that perfect balance where you’re using both butter and shortening, so you get amazing flavor without sacrificing that flaky texture we’re all chasing. What makes this pie dough recipe easy is that it’s forgiving. Even if you’re like me and tend to overthink things in the kitchen, this one comes together beautifully. I use it for everything from my Thanksgiving pumpkin pie crust recipe to summer peach pies. Some folks swear by a vegan pie crust recipe, and while I respect that, there’s something about a good pie crust recipe with butter that just hits different. You know what’s funny? My grandmother always said the best pie crust recipe is the one you’ll actually make. She was right. This isn’t some fussy, temperamental dough that requires a culinary degree. And when pecan pie season rolls around, this pecan pie crust recipe base is what I reach for every single time. Makes two crusts, which means you can freeze one for later or make a double crust pie. Trust me on this one.
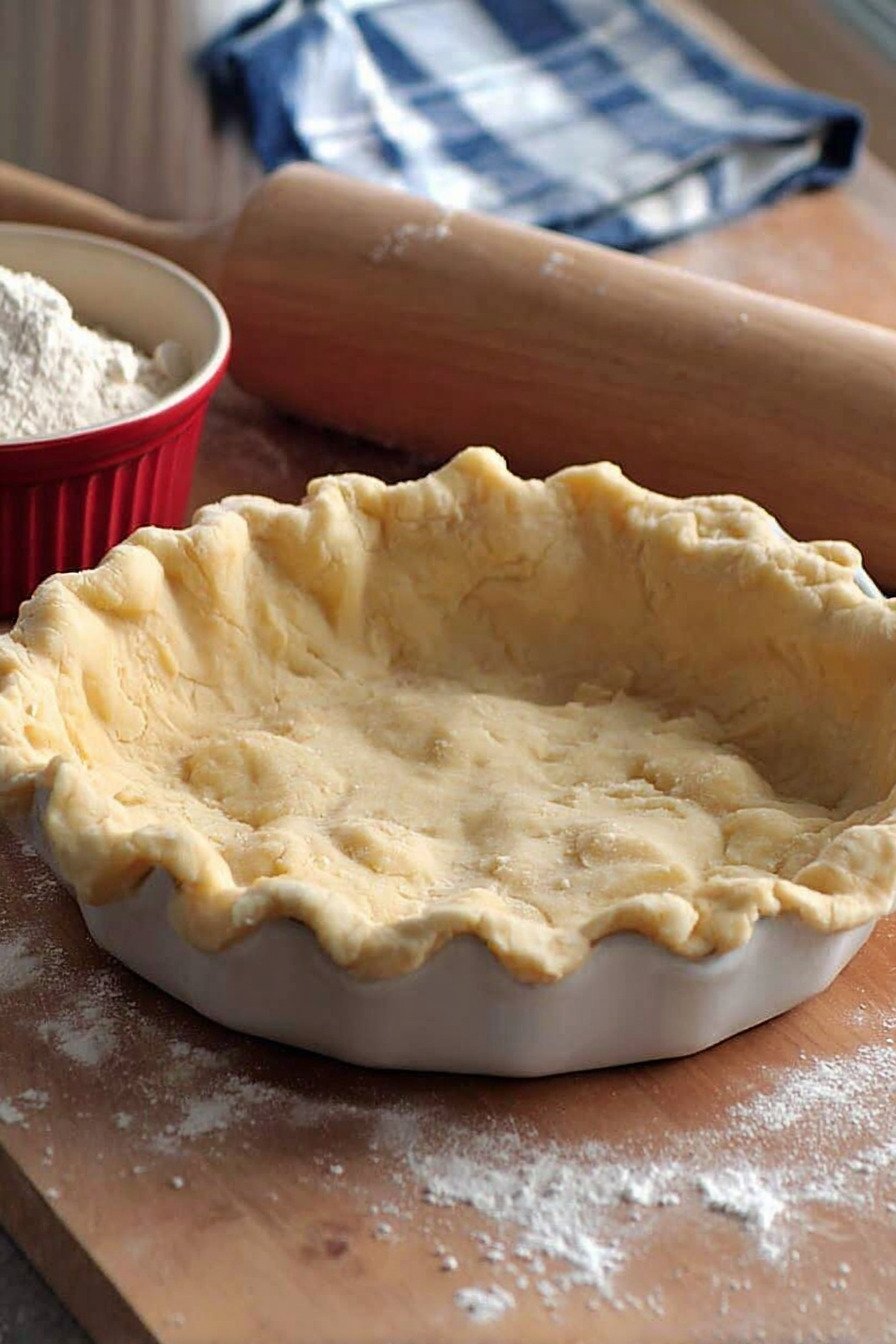
Table of Contents
- 1) Key Takeaways
- 2) Easy Nancy’s Flaky Butter Pie Crust Recipe
- 3) Ingredients for Nancy’s Flaky Butter Pie Crust
- 4) How to Make Nancy’s Flaky Butter Pie Crust
- 5) Tips for Making Nancy’s Flaky Butter Pie Crust
- 6) Making Nancy’s Flaky Butter Pie Crust Ahead of Time
- 7) Storing Leftover Nancy’s Flaky Butter Pie Crust
- 8) Try these Desserts next!
- 9) Nancy’s Flaky Butter Pie Crust
- 10) Nutrition
1) Key Takeaways
- What makes a pie crust flaky instead of tough?
- Can I use all butter or all shortening in pie dough?
- Why does my pie crust always shrink when I bake it?
- How long can I keep pie dough in the freezer?
- Do I really need to use vinegar in pie crust?
2) Easy Nancy’s Flaky Butter Pie Crust Recipe
Let me tell you about this pie crust recipe that changed my entire baking game. I spent years being scared of making homemade pie crust. Every pie crust recipe I tried either came out tough as leather or fell apart when I tried to roll it. Then I found this method, and suddenly everything clicked.
What makes this pie crust recipe different? It’s the combo of butter and shortening. I know some people swear by an all butter pie dough recipe easy to make at home, but hear me out. The shortening gives you that tender, flaky texture, and the butter brings all the flavor. You get the best of both worlds without compromising on anything.
This recipe makes two crusts, which I love. You can make a double crust pie, or freeze one for later. My freezer always has at least one disk of this dough waiting for me. When Thanksgiving rolls around and I need a pumpkin pie crust recipe, I just pull it out. When my neighbor brings over fresh pecans and I want to make my pecan pie crust recipe, it’s already there. Even for apple pies in the fall or berry pies in summer, this dough works perfectly.
The whole process takes about 45 minutes from start to finish, but most of that is just chilling time. The actual hands on work? Maybe 15 minutes tops. I’ve taught this recipe to friends who claimed they couldn’t bake, and they all succeeded. That’s how I know this is the best pie crust recipe for beginners and experienced bakers alike.
3) Ingredients for Nancy’s Flaky Butter Pie Crust
All Purpose Flour
You need 3 cups of all purpose flour, plus extra for dusting your work surface. I’ve tried bread flour before, thinking it would make the crust sturdier, but it just made it tough. Stick with all purpose. The protein content is just right for creating a tender crust that still holds together when you roll it out.
Kosher Salt
Just 1 teaspoon of kosher salt goes in here. Salt does more than just season the dough. It strengthens the gluten structure just enough to give you a crust that’s easy to work with. If you only have table salt, use about 3/4 teaspoon instead since it’s finer and more concentrated.
Cold Vegetable Shortening
You’ll need 3/4 cup of cold vegetable shortening, cut into small pieces. Keep it in the fridge until you’re ready to use it. The shortening creates those flaky layers we all want. Some folks prefer a vegan pie crust recipe and use all shortening instead of butter, which works too. The key word here is cold. Room temperature shortening will blend into the flour too much and you’ll lose that flakiness.
Cold Salted Butter
That’s 3/4 cup, or 1 1/2 sticks, of cold salted butter cut into pieces. This pie crust recipe with butter gets its amazing flavor from this ingredient. I cut my butter into chunks about the size of a walnut, then pop them back in the fridge for a few minutes before I start mixing. Cold butter is non negotiable here.
Large Egg
One large egg adds richness and helps bind everything together. The egg also gives the crust a beautiful golden color when it bakes. I crack mine into a small bowl first and beat it lightly with a fork before adding it to the flour mixture. Makes it easier to distribute evenly.
Ice Water
Start with 4 tablespoons of ice water. I literally put ice cubes in a measuring cup with water and let it sit while I’m cutting in the fats. You might need a bit more water depending on your flour and the humidity in your kitchen. Add it one teaspoon at a time if the dough seems too dry.
Distilled White Vinegar
Just 1 tablespoon of distilled white vinegar goes in. I know it sounds weird, but trust me on this. The acid in the vinegar tenderizes the gluten strands, which helps prevent a tough crust. You won’t taste it in the finished product, but you’ll notice the difference in texture. This is one of those secret ingredients that separates a good crust from a great one.
4) How to Make Nancy’s Flaky Butter Pie Crust
Step 1
Grab your biggest bowl and whisk together the flour and salt. Now add those cold butter pieces and shortening chunks. Here’s where you get your hands dirty, literally. Use a pastry cutter if you have one, or just use your fingers to work the fats into the flour. You want it to look like coarse crumbs with some pieces about the size of peas still visible. This takes me about 3 to 4 minutes. Don’t rush it, but don’t overwork it either.
Step 2
Take that egg you beat earlier and pour it right into the flour mixture. Add the ice water and vinegar too. Now use a fork to stir everything together gently. The dough should start clumping together and hold when you pinch it. If it’s still too crumbly and dry, add more ice water one teaspoon at a time. I usually end up adding about 2 more teaspoons, but it depends on the day.
Step 3
Turn the dough out onto your counter and divide it into two equal pieces. Don’t knead it or work it too much. Just shape each piece into a ball, then flatten it into a disk about half an inch thick. The disk shape makes it way easier to roll out later. Pop each disk into its own zip top bag and stick them in the freezer for 30 minutes. If you’ve got more time, let them chill in the fridge for at least an hour or even overnight.
Step 4
When you’re ready to make your pie, take one disk out of the freezer. Flour your counter generously. I mean really flour it. Don’t be shy here. Put your disk in the middle and flour the top of it too. Start rolling from the center out, turning the dough a quarter turn after each roll. This keeps it round and prevents sticking. Roll it into a circle that’s about 2 inches bigger than your pie plate all the way around.
Step 5
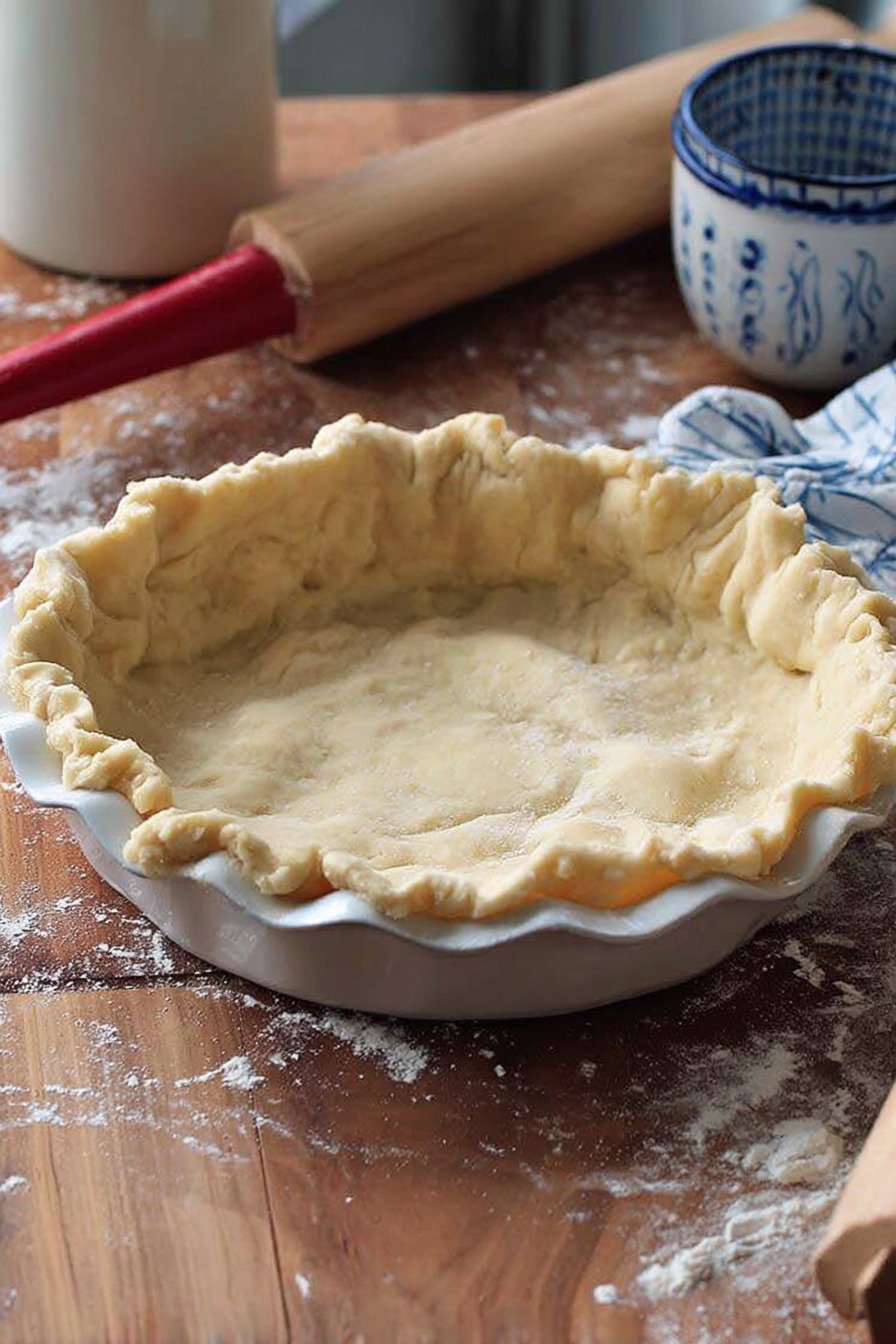
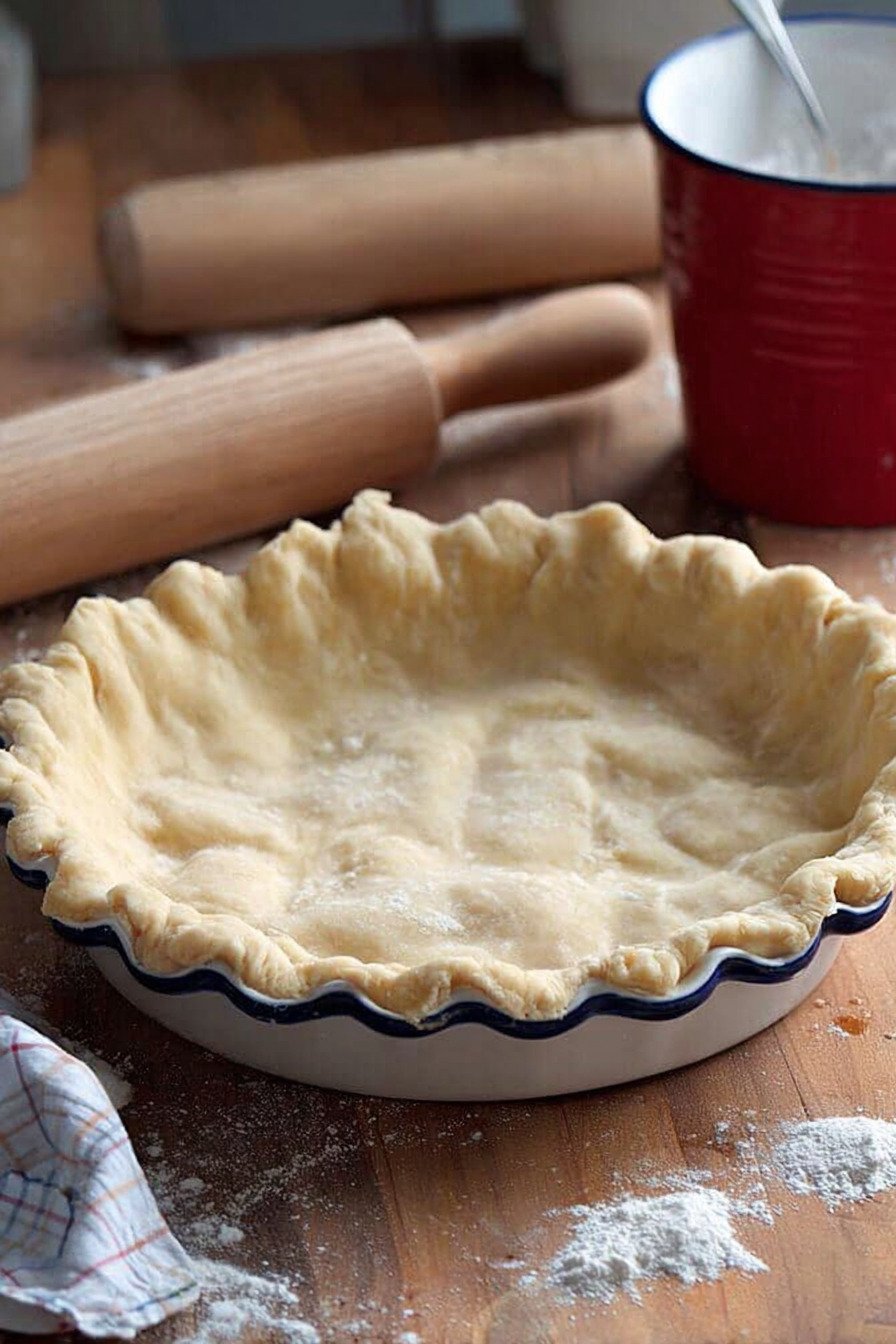
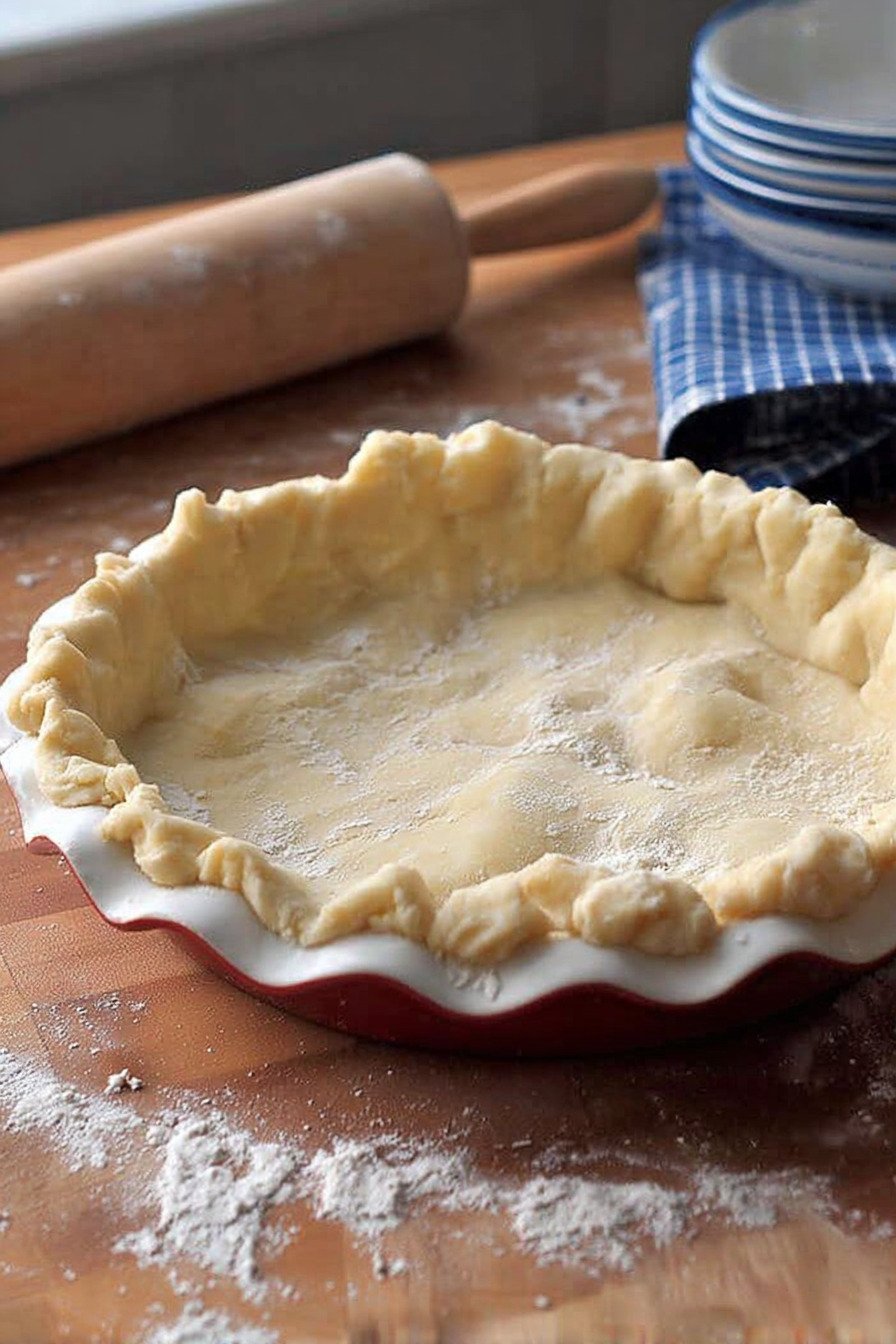
Now comes the tricky part. Gently roll the dough onto your rolling pin, then unroll it over your 9 inch pie plate. Let it drape naturally into the pan. Lift the edges and let gravity help it settle into the corners. Don’t stretch or pull the dough, or it’ll just shrink back when you bake it. Trim off the extra dough with kitchen scissors, leaving about an inch hanging over the edge all the way around.
Step 6
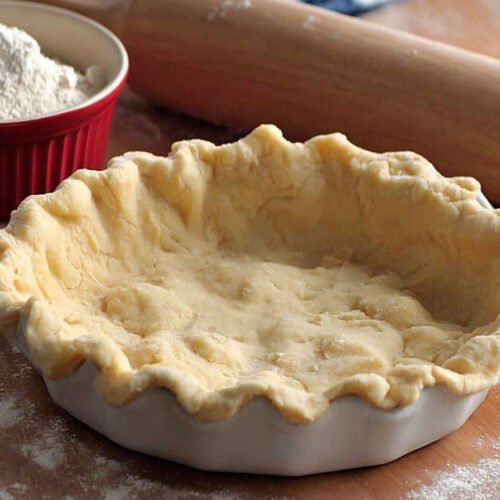
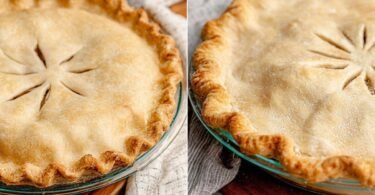
Take that overhang and tuck it under itself so you have a nice thick edge sitting on the rim of the pie plate. Now crimp or flute the edges however you like. I usually just press with a fork because I’m lazy, but you can get fancy if you want. Your crust is ready to fill and bake, or you can blind bake it if your recipe calls for that.
5) Tips for Making Nancy’s Flaky Butter Pie Crust
Keep everything cold. This is the single most important tip I can give you. Your butter should be cold. Your shortening should be cold. Your water should have ice in it. Even your bowl can be cold if you want to stick it in the freezer for 10 minutes before you start. When those cold fats hit the hot oven, they create steam pockets that make the crust flaky. If they melt into the flour before baking, you get a dense, tough crust instead.
Don’t overwork the dough. I learned this the hard way after making about 20 tough crusts in a row. Once you add that water and the dough starts coming together, stop mixing. It doesn’t need to form a perfect ball in the bowl. It just needs to hold together when you pinch it. All that extra mixing develops the gluten, and too much gluten means a tough crust.
Use the right flour. All purpose flour is your friend here. Don’t use bread flour or cake flour. Bread flour has too much protein and will make your crust chewy. Cake flour doesn’t have enough structure and your crust might fall apart. I keep a big bag of all purpose flour just for baking, and it works perfectly every time.
Give it time to rest. That chilling time isn’t optional. When you chill the dough, two things happen. The gluten relaxes, which prevents shrinking in the oven. The fats firm back up after you’ve worked them, which gives you those flaky layers. I usually chill mine for at least an hour in the fridge, sometimes overnight if I’m making pie the next day.
Roll it evenly. When you’re rolling out the dough, try to keep it an even thickness all over. I aim for about 1/8 inch thick. If it’s thicker in some spots, those parts won’t cook through properly. If it’s too thin in places, it might tear or burn. I learned to check by looking at it from the side as I roll.
6) Making Nancy’s Flaky Butter Pie Crust Ahead of Time
This pie dough recipe easy to prep ahead has saved me so many times. I like to make a double or triple batch on a lazy Sunday afternoon, then I’ve got dough ready whenever I need it. The dough keeps beautifully in both the fridge and the freezer, which makes it perfect for planning ahead.
If you’re making it just a day or two in advance, stick those disks in the fridge. Wrap each one tightly in plastic wrap first, then put them in zip top bags for extra protection. They’ll stay fresh for up to 3 days. When you’re ready to use them, let the dough sit on the counter for about 10 minutes to soften slightly. If it’s too cold, it’ll crack when you try to roll it.
For longer storage, the freezer is your best bet. Wrap each disk in plastic wrap, then in a layer of aluminum foil. Label them with the date so you remember when you made them. They’ll keep for up to 3 months in the freezer without any loss in quality. I usually have at least two disks in my freezer at all times.
When you want to use frozen dough, move it to the fridge the night before. Let it thaw slowly overnight. This gradual thawing keeps the texture perfect. If you forgot to move it and need it today, let it sit on the counter for about 30 to 45 minutes. Don’t try to roll it while it’s still frozen or it’ll just crack into pieces.
You can also roll out the dough and fit it into your pie plate ahead of time. Wrap the whole thing in plastic wrap and freeze it right in the pan. This is perfect for those mornings when you want fresh baked pie but don’t want to deal with rolling dough. Just take it from freezer to oven. You might need to add a few extra minutes to the baking time.
7) Storing Leftover Nancy’s Flaky Butter Pie Crust
Sometimes you end up with extra dough after trimming your pie crust. Don’t throw those scraps away. I collect all my scraps and press them together into a small disk. Wrap it up and stick it in the fridge or freezer just like you would a full disk. You can use these scraps to make mini hand pies, cut out shapes for decorating the top of your pie, or even make cinnamon sugar pie crust cookies.
If you rolled out both crusts but only needed one, rewrap the unused dough and put it back in the fridge or freezer. It’ll keep just as long as dough that hasn’t been rolled. The texture stays perfect. I do this all the time when I’m only making a single crust pie.
For dough that’s already rolled and fitted into a pie plate, you can freeze that too. Wrap it well in plastic wrap, then slide it into a large freezer bag. It takes up more space in the freezer this way, but it’s super convenient. When you’re ready to bake, you can fill it while it’s still frozen and pop it right in the oven.
Baked pie crust also freezes great. If you blind baked a crust and didn’t end up using it, let it cool completely first. Wrap it carefully so it doesn’t crack or break. Freeze it for up to 2 months. Thaw it on the counter when you need it, then fill and serve. The texture stays crisp and flaky.
Just remember to label everything with dates. I learned this after finding mystery packages in my freezer months later. Knowing when you made it helps you use older dough first. This pie crust recipe makes two crusts for a reason. One for now, one for later.
8) Try these Desserts next!
9) Nancy’s Flaky Butter Pie Crust
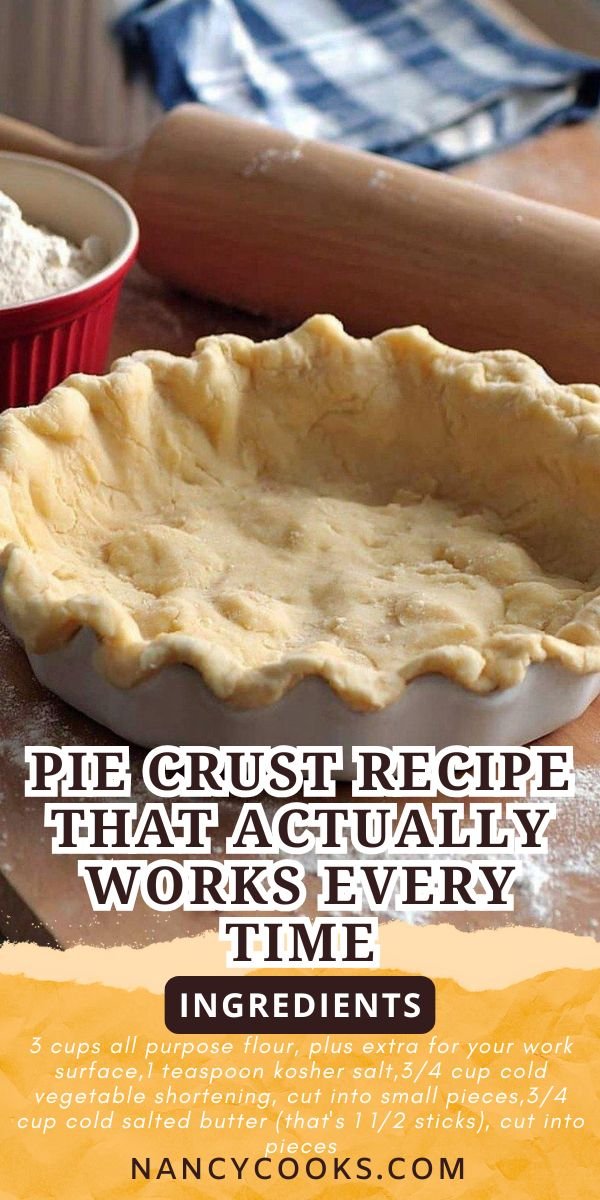
Pie Crust Recipe That Actually Works Every Time
Ingredients
- 3 cups all purpose flour, plus extra for your work surface
- 1 teaspoon kosher salt
- 3/4 cup cold vegetable shortening, cut into small pieces
- 3/4 cup cold salted butter (that’s 1 1/2 sticks), cut into pieces
- 1 large egg
- 4 tablespoons ice water, maybe a bit more if needed
- 1 tablespoon distilled white vinegar
Instructions
- Grab a big bowl and mix your flour with the salt. Toss in those cold butter pieces and shortening. Now here’s where it gets real: use a pastry cutter or just your fingers to work everything together until it looks like coarse crumbs. You want some pea sized chunks still hanging around.
- Crack your egg into a small bowl and beat it lightly with a fork. Pour it into your flour mixture. Add the ice water and vinegar. Stir everything gently with that fork until the dough starts coming together. If it feels too dry and crumbly, add more ice water one teaspoon at a time.
- Split the dough into two equal pieces. Shape each one into a ball, then flatten them into disks about half an inch thick. Pop each disk into its own zip top bag and stick them in the freezer for 30 minutes. Or if you’ve got time, let them hang out in the fridge for at least an hour until they’re nice and firm.
- When you’re ready to roll, take one disk out. Flour your counter generously (don’t be shy here) and roll that dough into a circle about 2 inches bigger than your pie plate. A rolling pin is your friend.
- Carefully move the dough to your 9 inch pie plate. Lift the edges gently and let it settle into the pan without stretching. Trim off the extra dough, leaving about an inch hanging over the edge. Tuck that overhang under itself, then crimp or flute the edges however you like. Now it’s ready for whatever filling you’ve got planned.
10) Nutrition
Serving Size: 1/16th of dough (for a double crust), Calories: 240, Sugar: 0 g, Sodium: 250 mg, Fat: 17 g, Saturated Fat: 8 g, Carbohydrates: 18 g, Fiber: 1 g, Protein: 3 g, Cholesterol: 35 mg

Leave a Comment