You ever get home so tired you can barely see straight, and your stomach’s growling louder than your to-do list? That’s when I pull out this creamy baked cream cheese chicken. Trust me, it’s pure weeknight magic wrapped in cheesy goodness. I first saw something like this scrolling through social media at midnight (we’ve all been there), and it had like a million views. One bite later, I totally got why. The sauce gets so rich and smooth, you’ll wanna lick the spoon. I’m not gonna lie, I’ve done it when nobody’s watching. What makes this one of my favorite chicken and cheese recipes? It’s ridiculously easy. Just 10 minutes of prep, then the oven does all the heavy lifting while you catch your breath. The chicken stays juicy, that cream cheese sauce gets all glossy and dreamy, and if you’re feeling fancy, the melted cheese on top seals the deal. Whether you’re hunting for keto cream cheese recipes or just need a solid recipe with cream cheese that won’t let you down, this one’s got you covered. We’re talking comfort food that feels a bit special without the fuss. No standing over a hot stove, no complicated steps. Pop it in, pour yourself a drink, and let dinner practically cook itself.
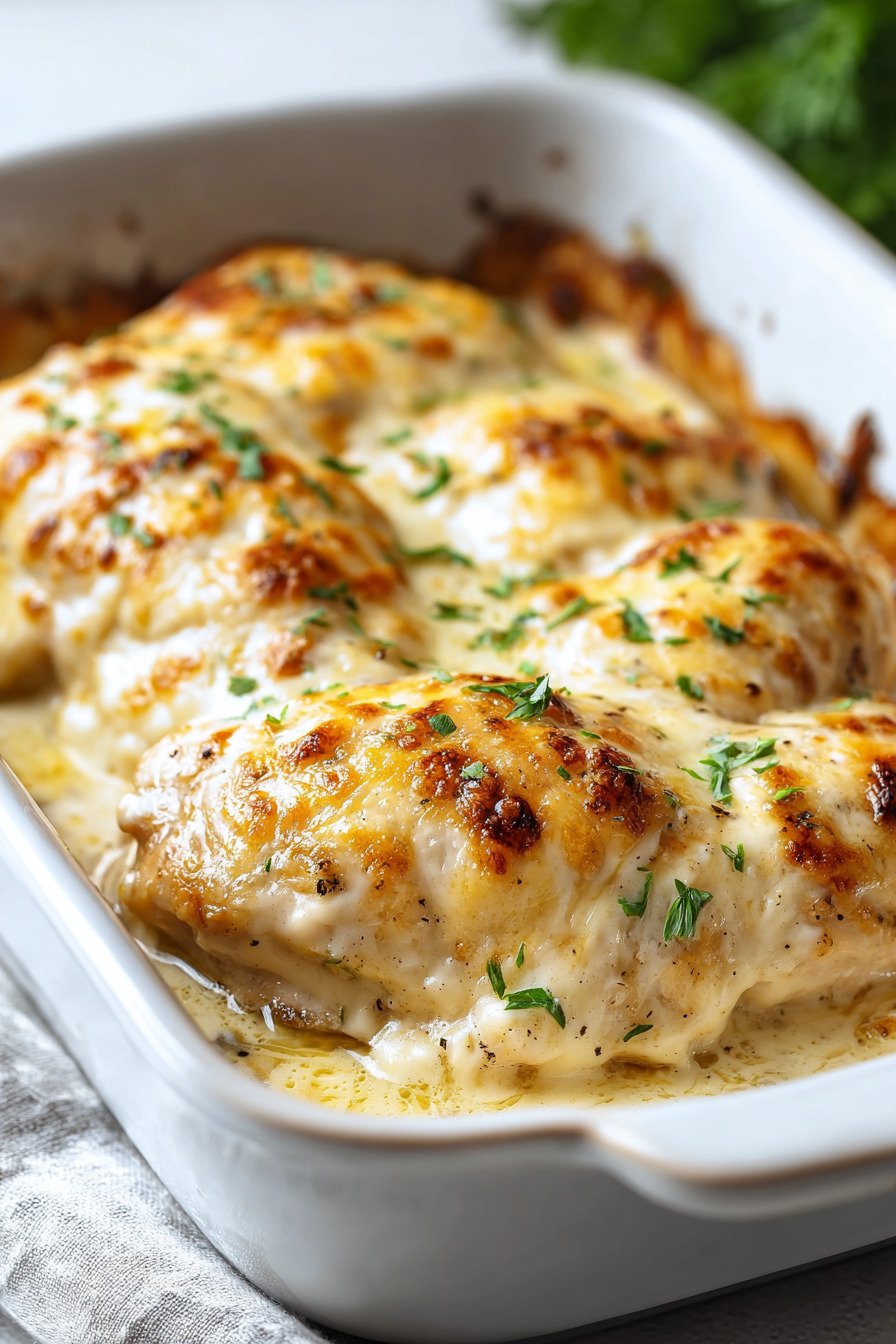
Table of Contents
- 1) Key Takeaways
- 2) Easy Baked Cream Cheese Chicken Recipe
- 3) Ingredients for Baked Cream Cheese Chicken
- 4) How to Make Baked Cream Cheese Chicken
- 5) Tips for Making Baked Cream Cheese Chicken
- 6) Making Baked Cream Cheese Chicken Ahead of Time
- 7) Storing Leftover Baked Cream Cheese Chicken
- 8) Try these Main Course recipes next!
- 9) Baked Cream Cheese Chicken
- 10) Nutrition
1) Key Takeaways
- What makes this chicken and cheese recipe so special?
- Can I prep this baked cream cheese chicken ahead?
- What sides pair best with creamy chicken dishes?
- How do I keep the chicken juicy and not dry?
2) Easy Baked Cream Cheese Chicken Recipe
Let me tell you about my favorite chicken and cheese recipes, and this baked cream cheese chicken sits right at the top of that list. We’re talking serious comfort food that doesn’t chain you to the kitchen for hours. I stumbled onto chicken and cheese recipes like this one when I was hunting for something that felt special but didn’t require me to play chef for the entire evening.
Quick. This recipe comes together faster than you can decide what to watch on Netflix. We’re talking 10 minutes of hands on time, then the oven does all the heavy lifting while you put your feet up. The chicken gets seared first, which locks in all that juicy goodness, then everything bakes together into this creamy, dreamy masterpiece.
Easy. If you can season chicken and stir a sauce, you’ve got this. There’s no complicated technique here, no fancy knife skills needed. Just straightforward cooking that anyone can nail on the first try. I’ve made this on nights when my brain was basically mush from work, and it still turned out perfect every single time.
Delicious. That cream cheese sauce gets so silky and rich you’ll want to bottle it up and save it for everything. The garlic adds just enough punch, the paprika brings a subtle smokiness, and when you pile cheese on top? Game over. My family literally fights over who gets to scrape the extra sauce from the pan.
Better. Most cream cheese chicken recipes leave you with dry, sad chicken that tastes like cardboard. Not this one. The searing step at the beginning plus the gentle baking means your chicken stays tender and juicy. No babysitting required, no constant temperature checking. Just pop it in and trust the process.
Versatile. This recipe plays well with so many different flavors. Toss in some bacon for smoky goodness, throw in mushrooms if that’s your thing, or crank up the heat with red pepper flakes. I’ve made it a hundred different ways and it never disappoints. That’s the beauty of a solid base recipe like this.
Crowd Pleaser. I’ve served this to picky eaters, food snobs, and everyone in between. They all go back for seconds. There’s something about that creamy sauce and melted cheese that just hits different. Kids love it, adults love it, and your mother in law will probably ask for the recipe.
3) Ingredients for Baked Cream Cheese Chicken
Boneless Skinless Chicken Breasts. I usually grab four nice sized breasts from the meat counter. If they’re super thick on one end, give them a quick pound with a rolling pin or even the bottom of a heavy pan. This helps them cook evenly so you don’t end up with one end dry and the other still raw. Sometimes I’ll grab the thin cut breasts to save myself the trouble, but regular ones work just fine with a little love tap.
Olive Oil. Just one tablespoon does the job for searing. You want something with a decent smoke point that won’t burn when you’re getting that golden crust on the chicken. Avocado oil works great too if that’s what you’ve got hanging around. I’ve even used a little butter when I’m feeling fancy, and honestly? No regrets.
Garlic. Fresh garlic is where it’s at, but I’m not gonna judge if you reach for the jarred stuff on a Tuesday night. One or two cloves minced up real good. Sometimes I go rogue and add three cloves because garlic breath is a small price to pay for flavor. Just don’t burn it when you’re making the sauce or it’ll turn bitter and ruin everything.
Chicken Broth. Half a cup might not seem like much, but it makes all the difference in that sauce. It thins out the cream cheese just enough and adds a savory depth that water just can’t match. Keep some bouillon cubes in your pantry for emergencies. Mix one with hot water and you’re golden. I always have a carton of broth in my fridge because I use it for everything.
Cream Cheese. Eight ounces of pure magic right here. This is what makes the sauce so ridiculously creamy and luscious. Make sure you soften it first or you’ll be wrestling chunks of cold cream cheese in your pan. If you forget like I do half the time, just pop it in the microwave for 15 seconds at a time until it’s nice and spreadable. Trust me on this one.
Fresh Chives. These little green guys add a mild oniony flavor and make everything look pretty. I chop up about a tablespoon’s worth. Dried chives work in a pinch, or you can substitute green onions if that’s what you’ve got. Sometimes I skip them entirely when I’m being lazy and the recipe still turns out great. Don’t stress about this ingredient too much.
Paprika. I’m obsessed with smoked paprika for this recipe. It adds this subtle warmth and complexity that makes people ask what your secret ingredient is. Regular paprika works too if smoked isn’t your jam. Don’t skip this though, it really does make a difference in the overall flavor profile. Just one teaspoon transforms everything.
Salt and Pepper. I cannot stress this enough. Season generously. Taste as you go. Don’t be scared of the salt shaker. Underseasoned food is just sad, and this recipe deserves better. I use kosher salt for cooking because the flakes are easier to control, but table salt works fine too. Just use a lighter hand since it’s more concentrated.
Sharp Cheddar Cheese. This is technically optional but why would you skip it? That bubbly, golden cheese top is half the fun. I use about half a cup of shredded sharp cheddar, but mozzarella gets stretchy and gooey if you prefer. Pepper jack brings some heat. Honestly, use whatever cheese is hanging out in your fridge. It all melts beautifully.
Fresh Parsley. Just for looks really. A sprinkle of chopped parsley makes it look like you tried. If you don’t have any or can’t be bothered to chop it, skip it. Your chicken will taste just as amazing. I keep dried parsley around for these moments when fresh herbs feel like too much effort. We’re going for delicious here, not Instagram perfection.
4) How to Make Baked Cream Cheese Chicken
Step 1. Crank your oven to 375°F and let it heat up while you prep. Grab your 9×13 inch baking dish and give it a good coating of olive oil or butter. I just pour a little oil in and use a paper towel to spread it around. This keeps everything from sticking and makes cleanup way easier later. Sometimes I use cooking spray when I’m feeling extra lazy, and that works just fine too.
Step 2. Pat your chicken breasts dry with paper towels. This seems like a small thing but it matters. Wet chicken won’t sear properly. Season both sides with salt, pepper, and paprika. Don’t be shy with the seasoning. I usually do a generous sprinkle of each, making sure every inch of chicken gets covered. This is your chance to build flavor, so really go for it.
Step 3. Heat that tablespoon of olive oil in your biggest skillet over medium heat. Wait until it shimmers and you see little ripples across the surface. That’s when you know it’s ready. Gently lay in your chicken breasts, making sure they’re not touching each other. You want them to sear, not steam. Let them cook for about 2 to 3 minutes without moving them around.
Step 4. Flip those chicken breasts over and give the other side the same treatment. Another 2 to 3 minutes until you get that gorgeous golden brown color. The chicken won’t be cooked through yet and that’s totally fine. We’re just building flavor and color here. The oven will finish the job. Once both sides are seared, transfer the chicken to your prepared baking dish.
Step 5. Now here’s where it gets good. Don’t wash that skillet. All those brown bits stuck to the bottom? That’s pure flavor gold. Toss in your minced garlic and let it sizzle for about 30 seconds. Your kitchen will smell incredible. Keep stirring so it doesn’t burn. Burned garlic tastes bitter and we’re not about that life.
Step 6. Pour in your chicken broth and use a wooden spoon to scrape up all those tasty bits from the bottom of the pan. This is called deglazing and it’s a game changer. Let the broth bubble for a minute or two. You’ll see it reduce down just slightly. This concentrates the flavor and makes everything taste more intense and delicious.
Step 7. Turn the heat down to low and add your softened cream cheese. Now comes the whisking. At first it’ll look chunky and weird, but keep stirring. The cream cheese will melt into the broth and turn into this smooth, luxurious sauce. It takes about 2 minutes of constant stirring. If you see lumps, just keep whisking. They’ll disappear, I promise.
Step 8. Once your sauce is silky smooth, stir in those chopped chives. Taste it and add more salt and pepper if needed. This is your last chance to get the seasoning perfect before it goes in the oven. I always taste at this point and usually add another pinch of salt. Don’t be scared to adjust. Your taste buds know what they want.
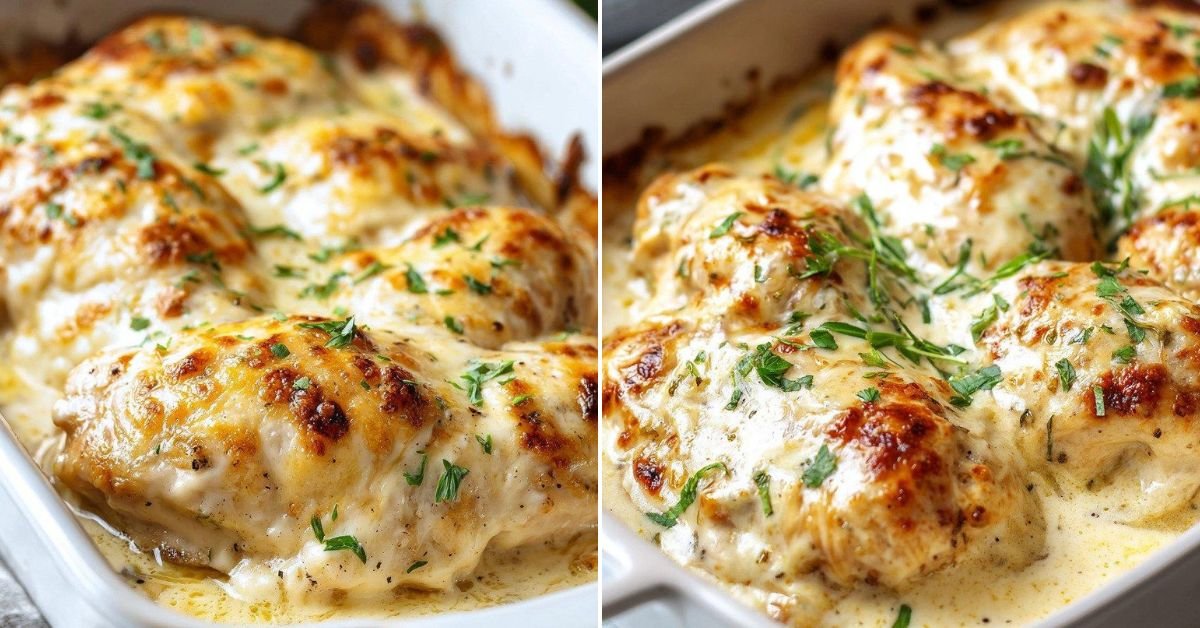
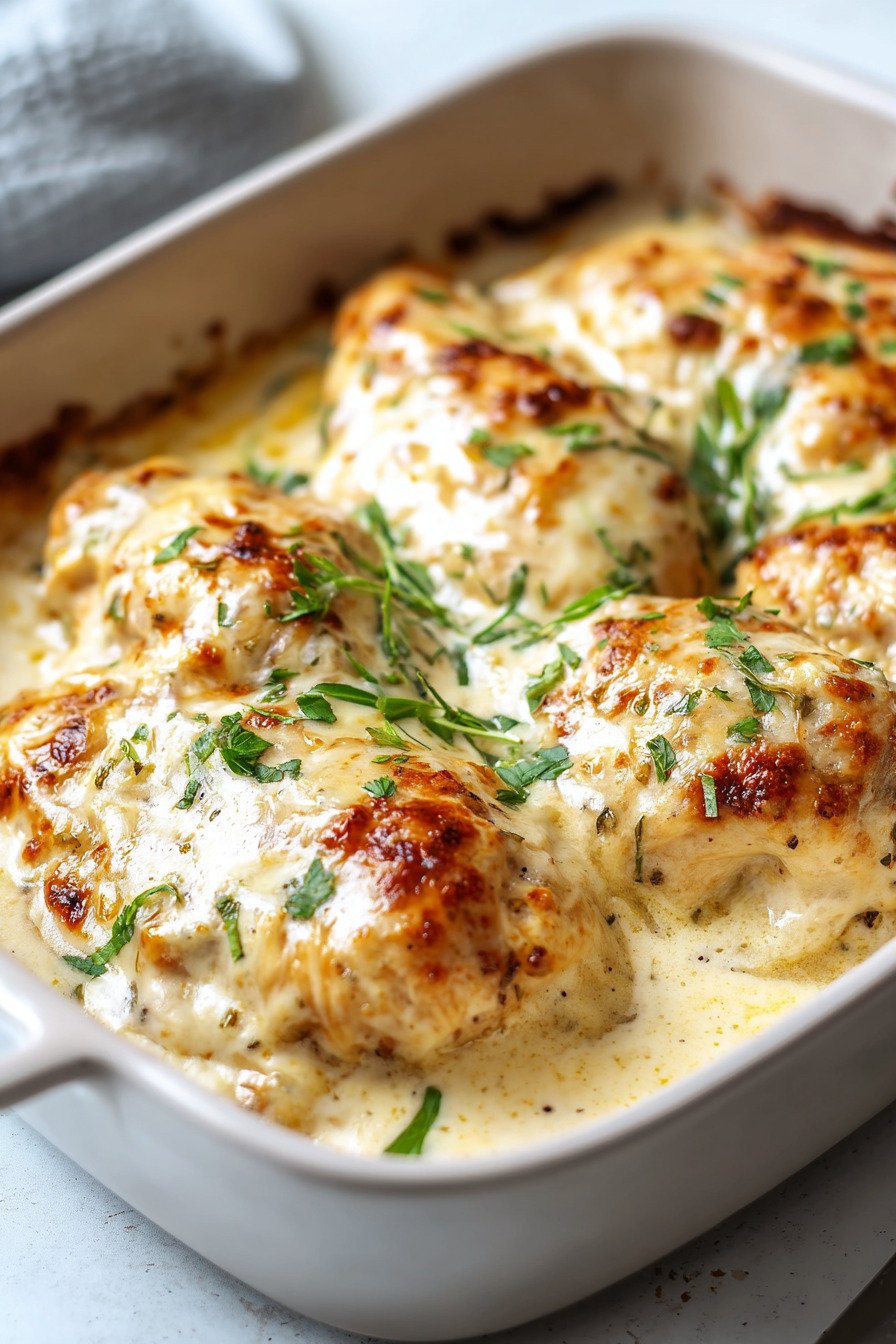
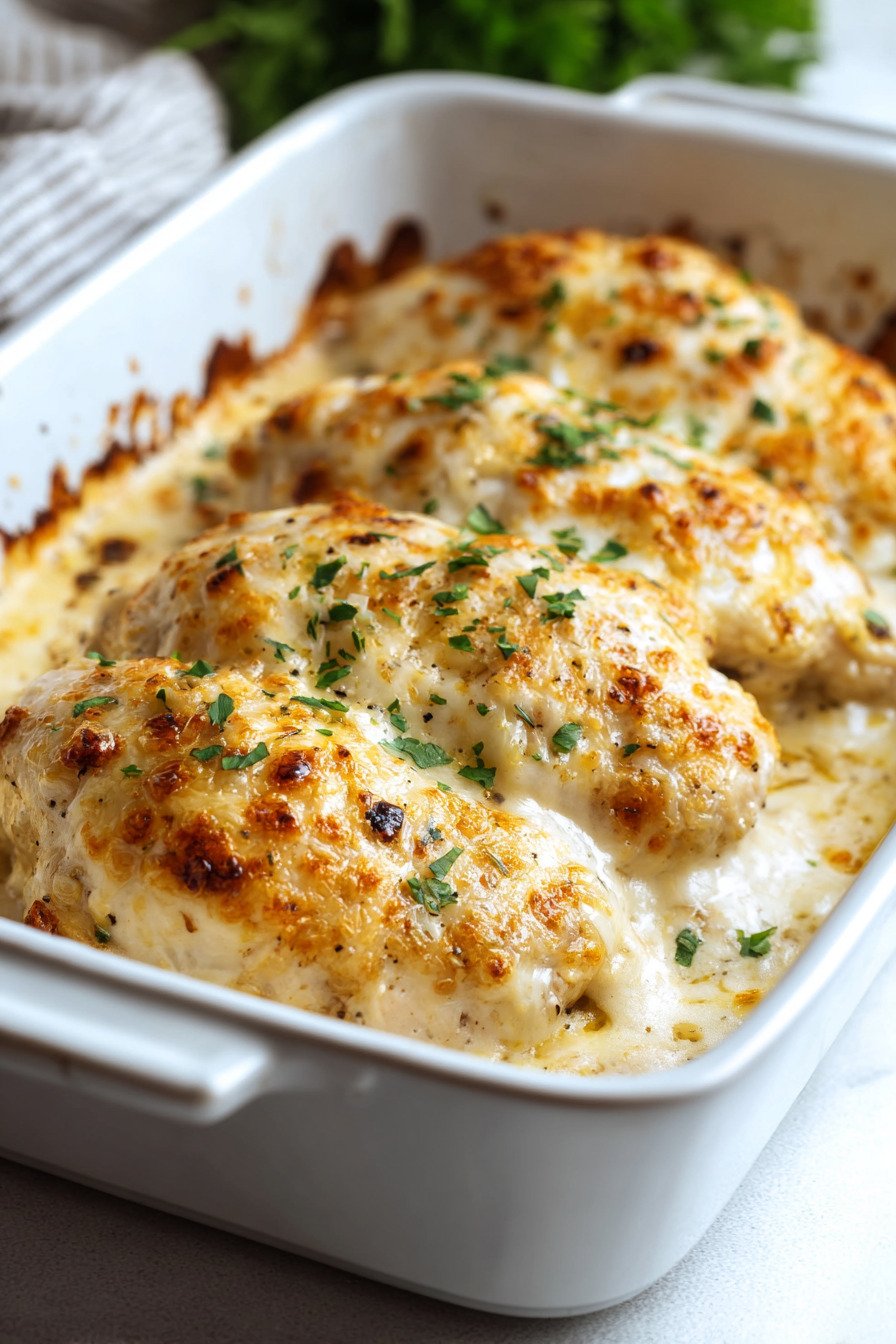
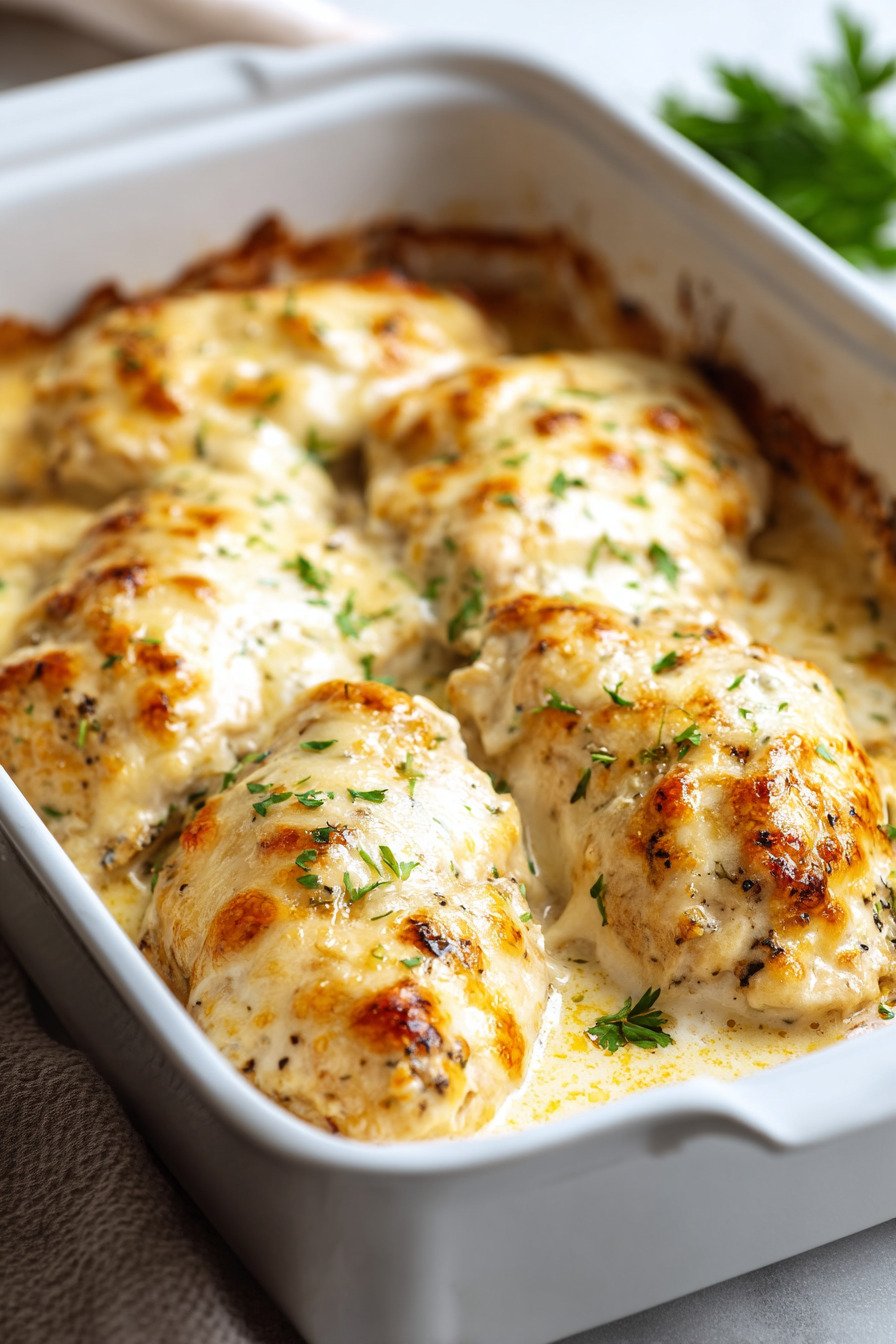
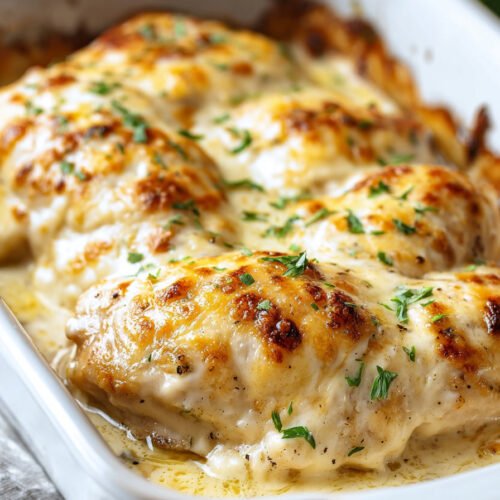
Step 9. Pour that gorgeous cream cheese sauce all over your chicken in the baking dish. Make sure every piece gets covered. Use a spoon to spread it around if you need to. If you’re using the cheese topping, now’s the time to sprinkle it over everything. That sharp cheddar is going to melt and bubble and get all golden brown and beautiful.
Step 10. Slide that dish into your preheated oven and set a timer for 25 minutes. Go relax. Pour yourself a drink. Catch up on your favorite show. The oven’s got this. After 25 minutes, check the thickest part of the chicken with a meat thermometer. You’re looking for 165°F. If it’s not there yet, give it another 5 minutes and check again.
Step 11. Want that cheese on top to get extra bubbly and golden? Turn on your broiler for the last 2 to 3 minutes. But stay close. Broilers are no joke and they can go from perfect to burnt in literally seconds. I learned this the hard way. Keep the oven door cracked and watch it like a hawk until you see that gorgeous golden color you’re after.
Step 12. Pull it out and let it rest for a couple minutes. The sauce will thicken up as it cools just slightly. Sprinkle some fresh parsley or extra chives on top if you’re feeling fancy. Serve it hot with plenty of that amazing sauce spooned over each piece. I like to keep some crusty bread on the side for mopping up every last drop.
5) Tips for Making Baked Cream Cheese Chicken
Don’t Skip the Searing. I know it adds an extra step, but trust me on this one. Searing the chicken before baking locks in moisture and adds incredible flavor. Those golden brown bits on the outside make all the difference. Plus, it only takes like 5 minutes total. When you compare that to the flavor payoff, it’s so worth it. Skipping this step is like leaving money on the table.
Soften That Cream Cheese. Nothing’s more frustrating than trying to whisk cold, hard cream cheese into your sauce. It just doesn’t work right. You’ll end up with lumps everywhere and a sad, broken sauce. Take it out of the fridge 30 minutes before you start cooking. Or if you’re like me and forget every single time, microwave it for 15 second bursts until it’s soft and spreadable. Life’s too short for lumpy sauce.
Use a Meat Thermometer. Look, I know it feels fussy, but it’s the only way to know for sure that your chicken is cooked through without being dry. Stick it in the thickest part of the breast. When it hits 165°F, you’re good to go. I used to just guess and hope for the best, and I ended up with overcooked chicken way too often. A cheap thermometer changed my life. Seriously.
Don’t Crowd the Pan. When you’re searing the chicken, give each piece some space. If they’re touching, they’ll steam instead of sear. Steam equals no golden crust, and that crust is where the flavor lives. Work in batches if you need to. It takes a little longer but the results are so much better. This is one of those small things that makes a huge difference in the final dish.
Taste and Adjust. Everyone’s taste buds are different. What’s perfectly seasoned to me might be bland to you. That’s why tasting as you go matters so much. After you make the sauce, take a little taste before pouring it over the chicken. Need more salt? Add it. Want more garlic? Throw another clove in there. This is your dinner, so make it exactly how you like it. Cooking should be fun, not stressful.
Let It Rest. I know you’re hungry. I know it smells amazing. But give your chicken a few minutes to rest after it comes out of the oven. This lets the juices redistribute throughout the meat instead of running all over your cutting board. Plus, the sauce thickens up nicely as it cools just slightly. Those 2 or 3 minutes of patience pay off with juicier, more flavorful chicken. Use the time to set the table or pour drinks.
Watch That Broiler. If you decide to broil the cheese topping at the end, do NOT walk away. I repeat, do not leave your kitchen. Broilers are powerful and they work fast. What looks perfect one second can turn into a blackened disaster the next. Keep the oven door cracked so you can see what’s happening. As soon as that cheese turns golden and bubbly, pull it out. You want gorgeous, not charred.
Save Those Pan Drippings. That sauce in the bottom of your baking dish after cooking? Liquid gold. Don’t leave it in the pan. Spoon it generously over each piece of chicken when you serve. I’ve been known to heat up extra sauce the next day just to drizzle over rice or pasta. It’s that good. Some people even save it to use as a base for soup later. Waste not, want not, right?
6) Making Baked Cream Cheese Chicken Ahead of Time
This chicken is perfect for meal prep and busy weeknights when you need dinner ready fast. I make it ahead all the time and honestly, the flavors get even better after sitting in the fridge overnight. Something about that cream cheese sauce just mellows and blends with the chicken in the best way possible. Here’s how I do it.
You can prep the whole thing up to 24 hours in advance. Sear your chicken, make your sauce, pour it over, and then just cover the baking dish tightly with plastic wrap or foil. Stick it in the fridge until you’re ready to cook. When dinnertime rolls around, take it out and let it sit on the counter for about 15 minutes while your oven preheats. Then bake as directed, adding maybe 5 extra minutes to account for the cold start.
If you want to get really ahead of the game, you can even freeze this whole setup. Sear the chicken, make the sauce, assemble everything in a disposable foil pan, and freeze it for up to 3 months. Just make sure you wrap it really well so it doesn’t get freezer burn. When you’re ready to cook, thaw it overnight in the fridge, then bake as usual. It’s like having a homemade frozen dinner, but way better than anything you’d buy at the store.
The only thing I don’t recommend doing ahead is adding the cheese topping. Cheese can get a little funky in the fridge if it sits too long before cooking. Just keep it in a separate container and sprinkle it on right before the dish goes into the oven. This keeps everything fresh and ensures you get that perfect golden, bubbly top without any weird texture issues.
For batch cooking, this recipe doubles or even triples really easily. Use multiple baking dishes or one giant roasting pan. I’ve made this for potlucks and family gatherings, and it always disappears fast. Just keep in mind that if you’re making a huge batch, it might need a little extra time in the oven. Check that internal temperature to be sure everything’s cooked through properly. Better safe than sorry when you’re feeding a crowd.
One trick I learned from years of meal prepping is to slightly undercook the chicken if you’re planning to reheat it later. Take it out when it hits about 160°F instead of 165°F. Then when you reheat it, it’ll finish cooking and hit that perfect temperature without getting dried out. This makes for much better leftovers that actually taste fresh and juicy instead of like cardboard. Game changer for lunch meal prep.
7) Storing Leftover Baked Cream Cheese Chicken
Let’s talk leftovers, because this chicken actually gets better the next day. That sauce soaks into the chicken overnight and everything just tastes more melded together and delicious. I’ve been known to intentionally make extra just so I can have leftovers for lunch. It’s that good reheated.
Storage is simple. Once the chicken cools down to room temperature, transfer it to an airtight container. Pour all that extra sauce over the top. Don’t leave that liquid gold behind. It keeps the chicken moist during storage and adds so much flavor when you reheat. I usually use glass containers with snap on lids because they don’t stain and they seal really well. Plus you can see what’s inside without opening them.
In the fridge, this chicken stays good for 4 to 5 days. Any longer and you’re pushing your luck with food safety. I try to eat mine within 3 days just to be safe, but I’ve gone to 4 or 5 before without any issues. Just use your nose. If it smells off or looks weird, toss it. No meal is worth getting sick over, no matter how delicious.
Reheating is where people usually mess up leftover chicken. Don’t just blast it in the microwave on high power. That’s how you get rubbery, dry chicken. Instead, put your portion in a microwave safe dish, cover it loosely, and heat on medium power for 2 to 3 minutes. Stir halfway through. The lower power setting heats more gently and keeps everything moist and tender.
Oven reheating is even better if you have the time. Put your chicken in an oven safe dish, cover with foil, and heat at 325°F for about 15 minutes. If the sauce looks too thick after being in the fridge, add a splash of chicken broth or milk before reheating. This loosens everything up and makes it creamy again. You want it to look and taste fresh, not dried out and sad.
Freezing works great for longer storage. This chicken can live in your freezer for up to 3 months. Let it cool completely first, then wrap individual portions tightly in plastic wrap followed by a layer of aluminum foil. Or use freezer bags and squeeze out as much air as possible. Label everything with the date so you don’t end up with mystery meat situation six months from now. We’ve all been there.
When you’re ready to eat frozen chicken, thaw it overnight in the fridge. Never thaw on the counter because that’s how bacteria parties happen. Once thawed, reheat using one of the methods above. It’ll taste almost as good as the day you made it. The texture might be slightly different, but the flavor will still be amazing. I keep portions in my freezer for those nights when cooking feels impossible.
One last tip for keto cream cheese recipes fans. This chicken fits perfectly into low carb meal plans. Just serve it with cauliflower rice or roasted vegetables instead of regular rice or pasta. The rich cream cheese sauce makes you feel like you’re eating something indulgent, but it’s actually pretty friendly for anyone watching their carb intake. Leftovers pack well for lunch too.
8) Try these Main Course recipes next!


9) Baked Cream Cheese Chicken
Chicken And Cheese Recipes: Creamy Baked Chicken with Cream Cheese
Ingredients
- 4 boneless, skinless chicken breasts
- 1 tablespoon olive oil
- 1 clove garlic, minced
- 1/2 cup chicken broth
- 8 ounces cream cheese, softened
- 1 tablespoon fresh chives, chopped
- 1 teaspoon paprika (smoked paprika works great too)
- Salt and pepper to taste
- 1/2 cup shredded sharp cheddar cheese (optional, for topping)
- Fresh parsley, chopped (optional, for garnish)
Instructions
- Preheat your oven to 375°F (190°C). Grab a 9×13 inch baking dish and give it a light coating of olive oil, butter, or whatever you’ve got on hand.
- Season both sides of the chicken breasts with salt, pepper, and paprika. Don’t be shy with it.
- Heat up that tablespoon of olive oil in a big skillet over medium heat. Once it’s shimmering, lay in your chicken and sear for about 2 to 3 minutes per side until you get a nice golden color. It won’t be cooked through yet, and that’s totally fine.
- Nestle those golden chicken pieces into your prepared baking dish.
- Using the same skillet (hello, flavor town), toss in your minced garlic and let it sizzle for about 30 seconds until it smells amazing. Pour in the chicken broth and scrape up all those tasty brown bits stuck to the bottom of the pan.
- Lower the heat and add the softened cream cheese. Whisk or stir until you’ve got a smooth, thick sauce. It might look lumpy at first, but keep stirring and it’ll come together beautifully. Mix in those chives and taste for salt and pepper.
- Pour or spoon that gorgeous sauce all over the chicken in your baking dish, making sure every piece gets covered. If you’re using cheese on top, now’s the time to sprinkle it over everything.
- Bake uncovered for 25 to 30 minutes, until the chicken’s cooked through and hits 165°F (74°C) inside. If your chicken breasts are on the thick side, give them a few extra minutes.
- Want a bubbly golden cheese top? Flip on the broiler for 2 to 3 minutes at the end. Just keep an eye on it because broilers can go from perfect to burnt real quick.
- Let it rest for a couple minutes before serving. The sauce will thicken up nicely. Sprinkle some parsley or extra chives if you’re feeling fancy, then dig in while it’s hot.
10) Nutrition
Serving Size 1 chicken breast with sauce | Calories 420 | Sugar 1.2 g | Sodium 580 mg | Fat 28.5 g | Saturated Fat 14.3 g | Carbohydrates 4.8 g | Fiber 0.5 g | Protein 38.2 g | Cholesterol 165 mg


Leave a Comment