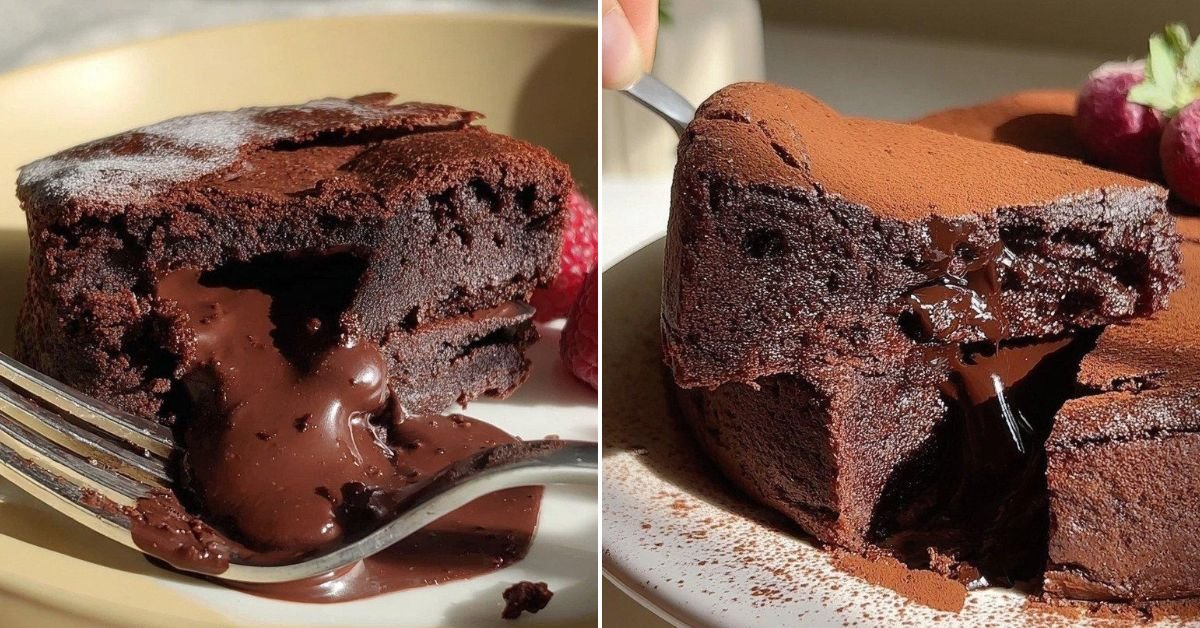
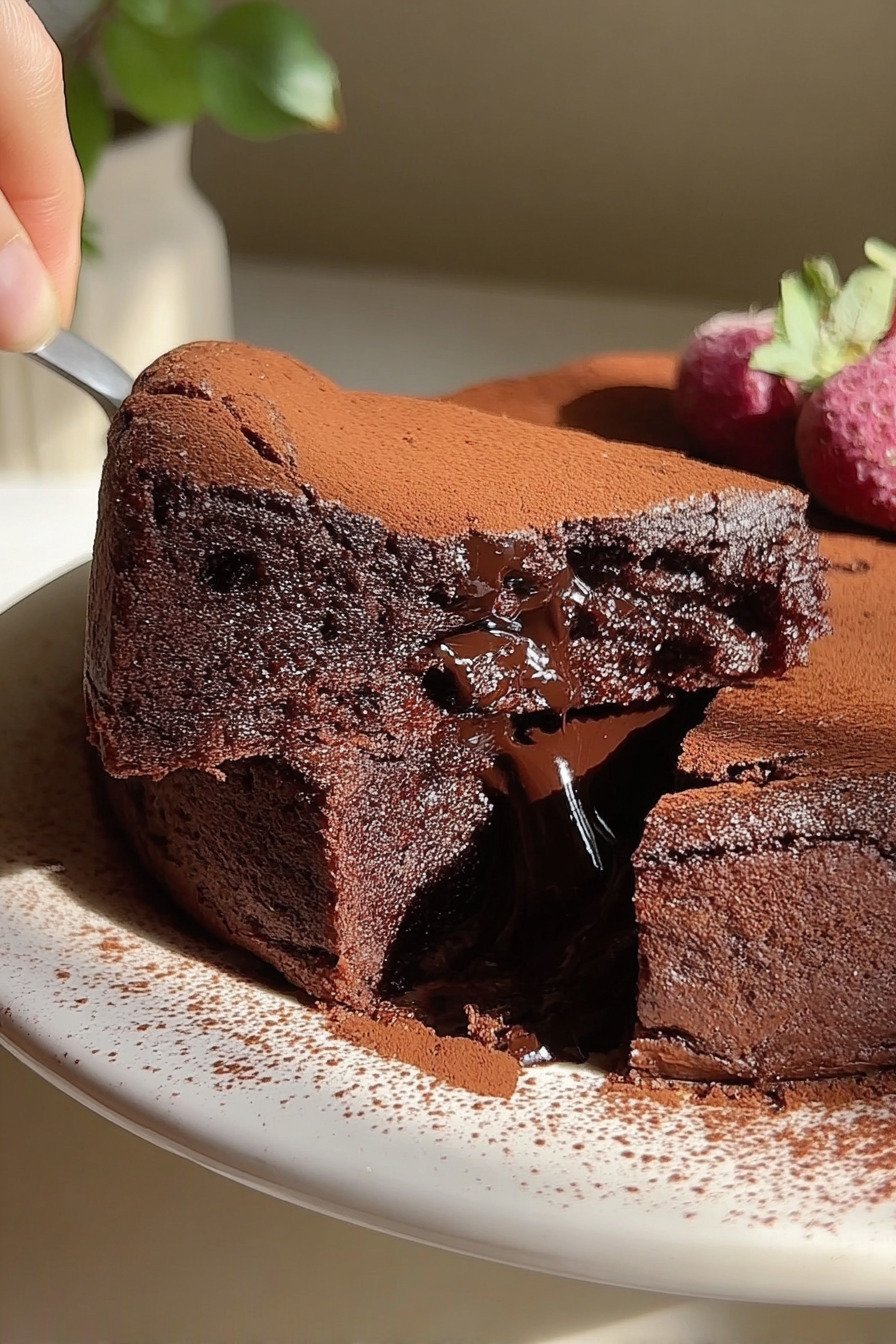
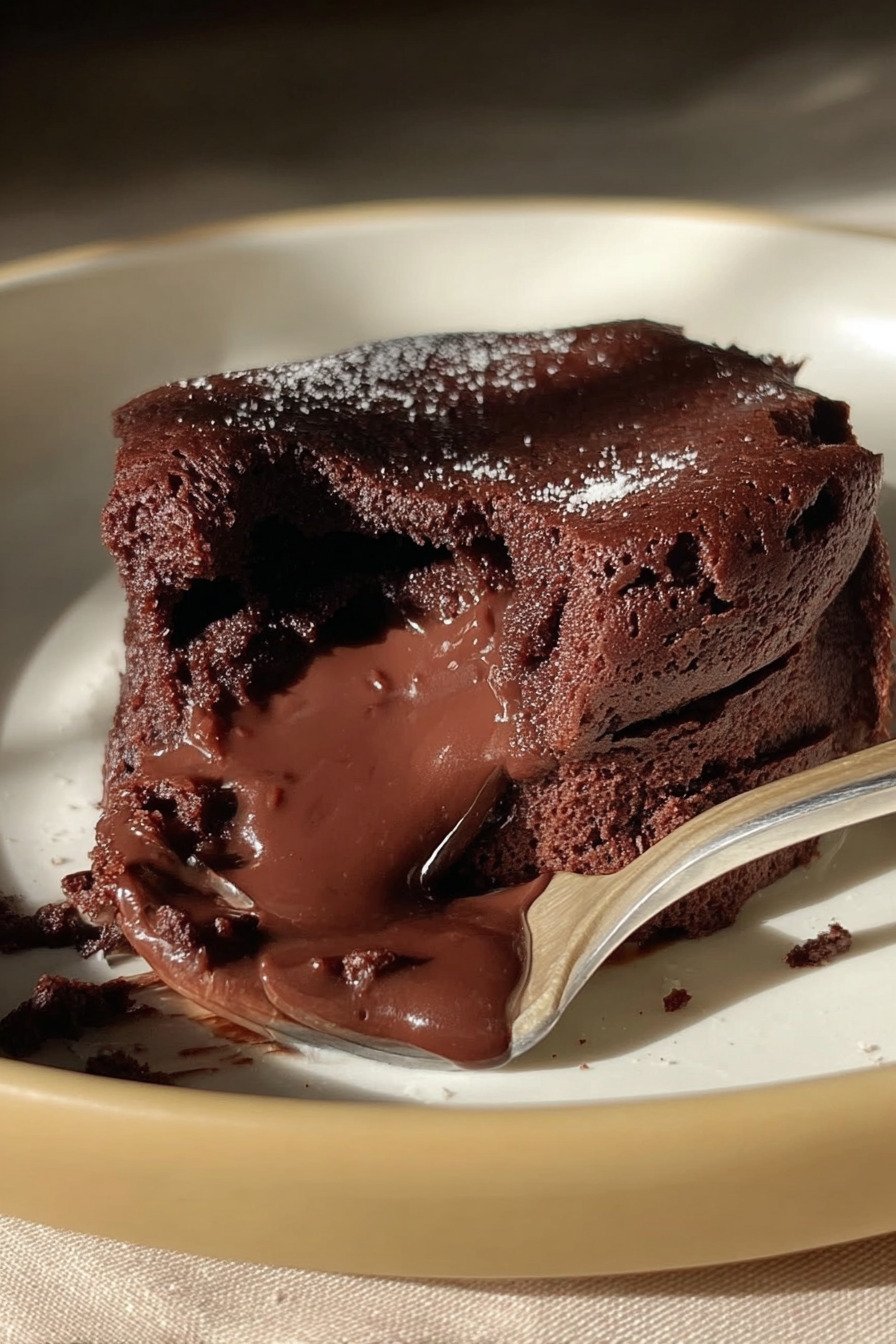
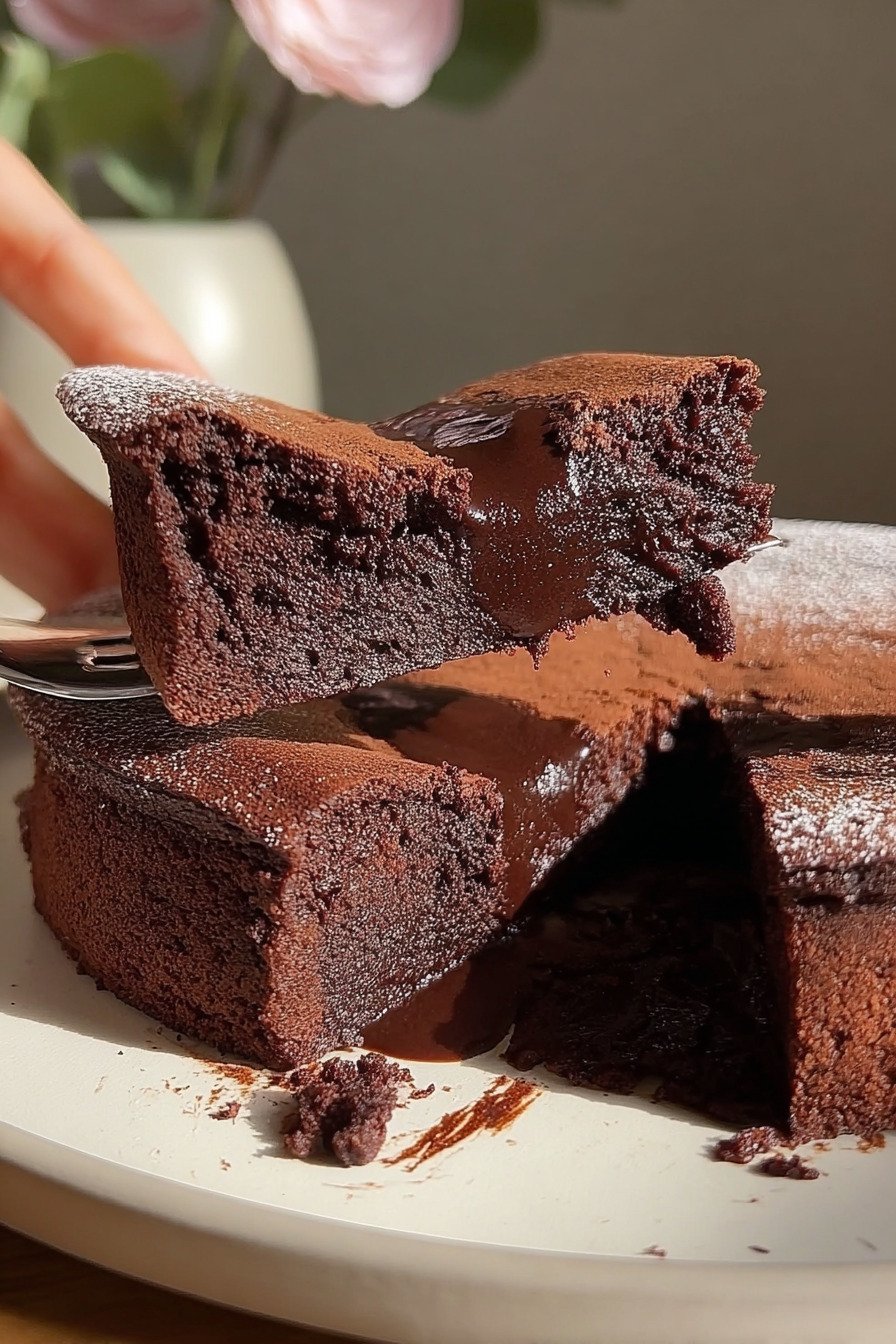
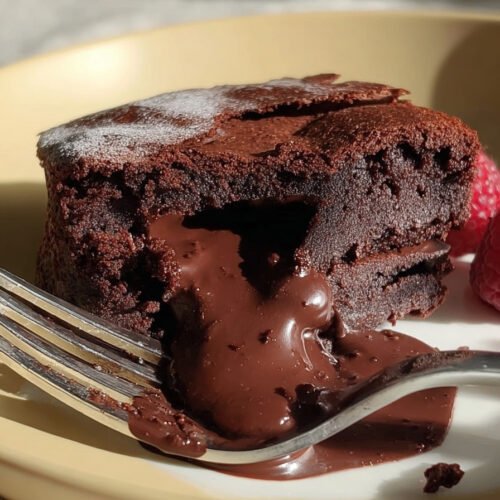
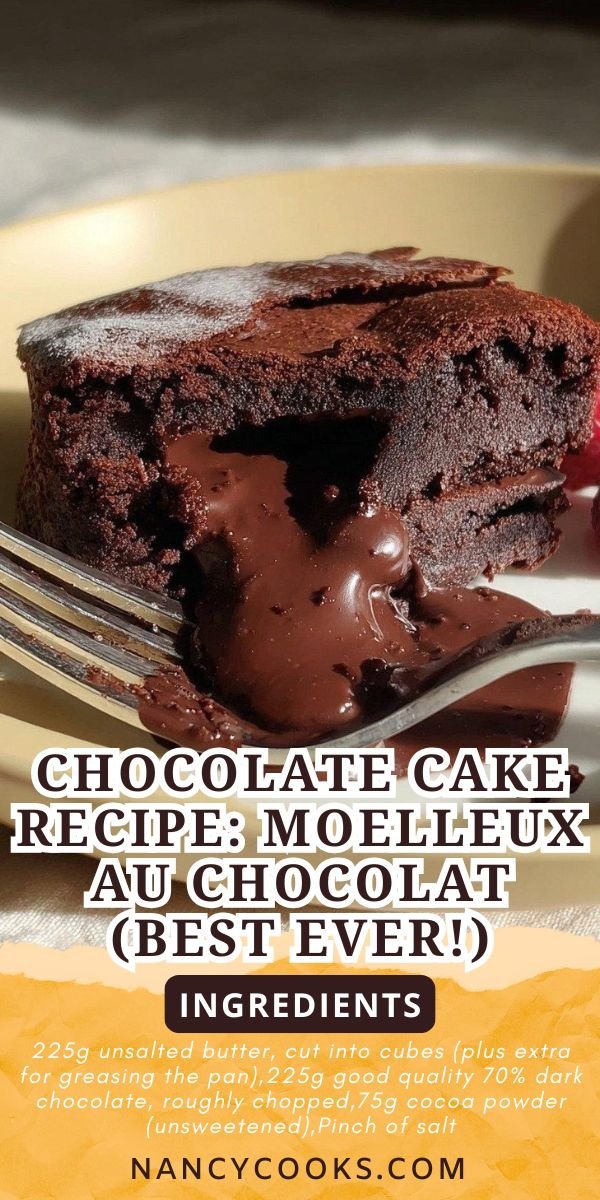
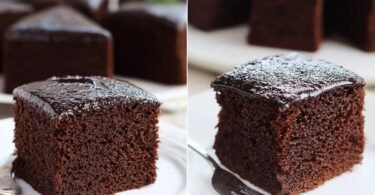
Okay, I’m just going to say it: this chocolate cake recipe might be the best thing I’ve ever baked. We’re talking about a twice-baked miracle that’s part molten lava cake, part fudgy brownie, and completely irresistible. I first stumbled on this recipe for chocolate cake when I was craving something deeply chocolatey, and let me tell you, it delivered. What makes this simple chocolate cake recipe so special? You bake it once, let it cool, then spread more batter on top and bake it again. Sounds fancy, right? But it’s actually easier than you think. The first layer becomes this perfect fudgy base while the second layer stays gooey and molten. It’s like getting two desserts in one. I’ve tried many a milk chocolate cake recipe and one bowl chocolate cake recipe, but nothing compares to the richness here. Serve it warm with vanilla ice cream or cold from the fridge where it transforms into something between a brownie and chocolate mousse. I’ve even made it as a strawberry chocolate cake recipe by adding fresh berries on top. And if you’re feeling adventurous, this double chocolate cake recipe works beautifully with raspberries too. Trust me, you need this in your life.
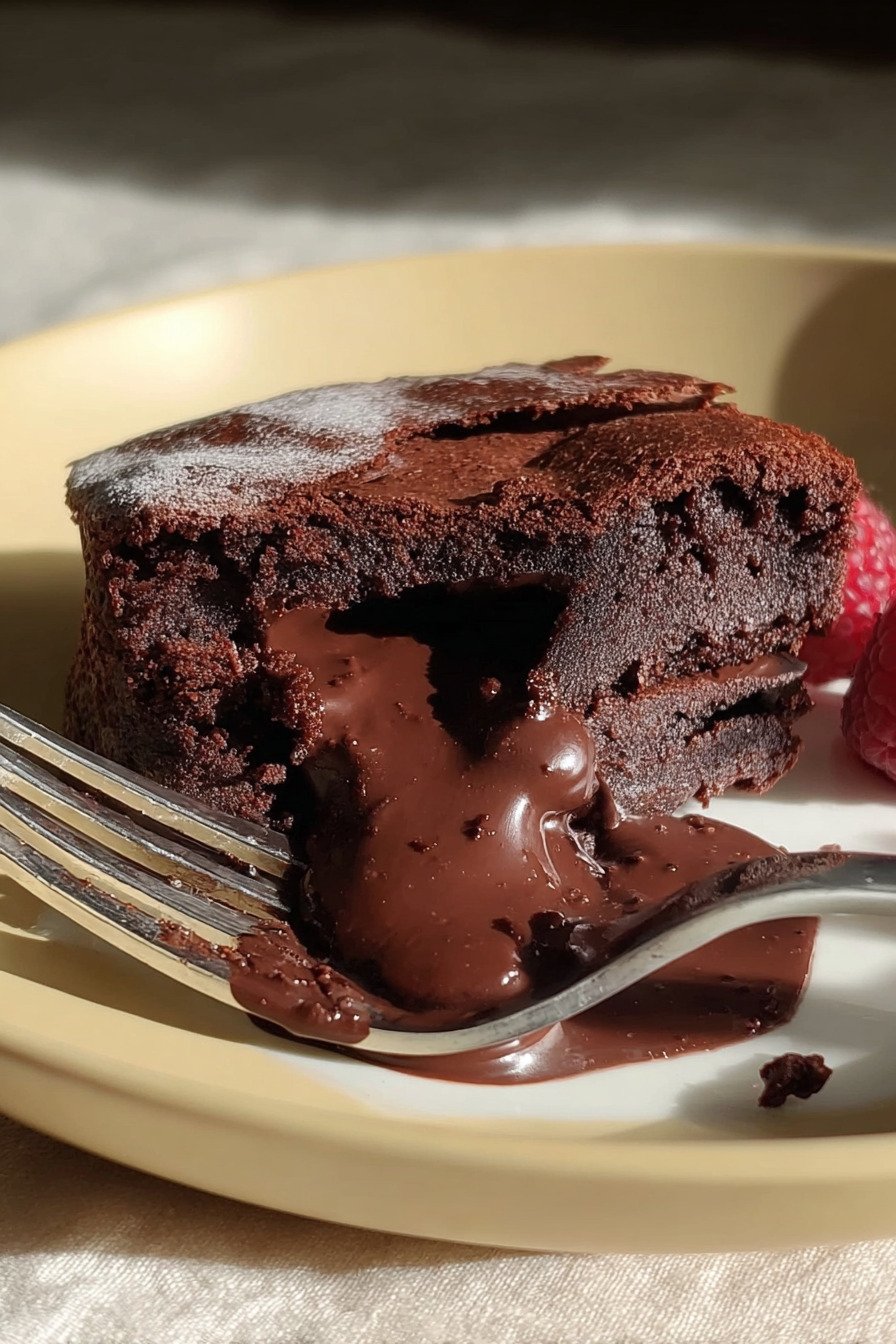
Table of Contents
- 1) Key Takeaways
- 2) Easy Moelleux au Chocolat Recipe
- 3) Ingredients for Moelleux au Chocolat
- 4) How to Make Moelleux au Chocolat
- 5) Tips for Making Moelleux au Chocolat
- 6) Making Moelleux au Chocolat Ahead of Time
- 7) Storing Leftover Moelleux au Chocolat
- 8) Try these Desserts next!
- 9) Moelleux au Chocolat
- 10) Nutrition
1) Key Takeaways
- What makes this chocolate cake recipe different from regular cakes?
- Can I make Moelleux au Chocolat ahead of time?
- Why do you bake this cake twice?
- What’s the secret to getting that molten center?
- Is this cake really gluten free?
2) Easy Moelleux au Chocolat Recipe
I’ve been baking for years, and I can tell you that this chocolate cake recipe completely changed my understanding of what cake could be. When I first heard about Moelleux au Chocolat, I thought it would be complicated. The French name alone made me nervous! But here’s the thing that blew my mind: this chocolate cake recipe is actually one of the easiest desserts I’ve ever made. No flour means no measuring cups full of white powder all over your counter. Just five simple ingredients that you probably already have.
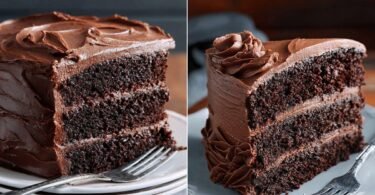
What makes this recipe for chocolate cake so special is the texture. The bottom layer bakes into something dense and fudgy, almost like a brownie. Then you spread more batter on top and bake it again, creating this incredible molten layer that stays gooey and luscious. It’s like getting two desserts in one pan. My kids call it “the volcano cake” because when you cut into it, that chocolate center just flows out.
The timing works perfectly for dinner parties too. You can bake the first layer in the afternoon, let it cool, then pop the second layer on right before your guests arrive. By the time you’ve finished dinner, your kitchen smells like a chocolate shop and you’ve got this showstopper dessert ready to go. I’ve served this at least a dozen times, and people always ask for the recipe. Some have even accused me of lying about how easy it is to make!
This simple chocolate cake recipe adapts beautifully too. Want to make it a strawberry chocolate cake recipe? Just pile fresh berries on top. Craving a double chocolate cake recipe? Add chocolate chips to the batter. The base recipe is so solid that you can play around with it and still get amazing results every time.
3) Ingredients for Moelleux au Chocolat
Unsalted Butter: We’re using a full 225 grams here, which is about one cup. I always go for unsalted so I can control exactly how much salt goes into the cake. The butter melts right into the chocolate, creating this silky base that makes everything come together. Don’t even think about using margarine or some low fat substitute. This is a celebration dessert, and we’re going all in with real butter.
Dark Chocolate: Here’s where quality really matters. I use 70% dark chocolate, and trust me, you can taste the difference between cheap chocolate and the good stuff. Break it into chunks before melting. You don’t need to be precious about it, just rough chop with a knife. The chocolate is doing the heavy lifting in this recipe, so get something you’d actually enjoy eating by itself. I like Lindt or Ghirardelli when I can find them on sale.
Cocoa Powder: Make sure you’re grabbing unsweetened cocoa powder, not the hot chocolate mix! I learned this the hard way when I was first starting out. The cocoa adds an extra layer of chocolate intensity without making the cake too heavy. Sift it over the melted chocolate mixture so you don’t get any lumps. Nobody wants to bite into a pocket of dry cocoa powder.
Salt: Just a pinch, but it’s doing important work. Salt makes chocolate taste more chocolatey. It’s one of those weird kitchen magic tricks that actually works. I use regular table salt, nothing fancy. Some people get all worked up about sea salt or kosher salt, but honestly, for a pinch in a cake, it doesn’t matter that much.
Eggs: Seven large eggs might seem like a lot, but you’re separating them and whipping the whites into peaks. This is what gives the cake its structure since there’s no flour. I know separating eggs can feel intimidating if you’ve never done it before, but it gets easier every time. Just crack the egg and pass the yolk back and forth between the shell halves, letting the white drip into a bowl. If you break a yolk, save that egg for scrambling tomorrow.
Caster Sugar: This is superfine sugar, and it dissolves better than regular granulated sugar. You’re dividing it between the egg yolks and whites. If you can’t find caster sugar at your store, just pulse regular sugar in a food processor for a few seconds. I’ve done it both ways and honestly can barely tell the difference, but the caster sugar does make everything come together a bit smoother.
4) How to Make Moelleux au Chocolat
Step 1: Get your oven going at 180°C if you have a fan oven, or bump it up to 200°C if you don’t. Grab your springform pan and butter it like your life depends on it. I’m talking about really getting in there with that butter, especially around the edges and in the corners. Then line the bottom with parchment paper. This cake is precious, and we’re not risking it sticking to the pan.
Step 2: Time to melt the butter and chocolate together. I usually do this in the microwave because I’m lazy. Just nuke it for 30 seconds, stir, then another 30 seconds, stir again. Keep going until it’s smooth and glossy. If you want to feel fancy, you can do the double boiler thing with a bowl over simmering water. Either way works perfectly fine. Just make sure the bowl doesn’t touch the water or your chocolate might seize up.
Step 3: Once your chocolate mixture is smooth, sift the cocoa powder and salt right over the bowl. Stir it all together until you’ve got this gorgeous, dark, glossy mixture. Set it aside and let it cool down a bit while you deal with the eggs. You don’t want to add hot chocolate to eggs or you’ll end up with chocolate scrambled eggs, which is not the vibe we’re going for.
Step 4: Separate your eggs. Whites go in your stand mixer bowl, yolks go in another large bowl. Add about half the sugar to the yolks and whisk them with an electric mixer for a couple of minutes. You’re looking for them to go pale and thick, almost like a light yellow pudding. When you lift the whisk, the mixture should fall in ribbons that hold their shape for a second before melting back in.
Step 5: Now whisk those egg whites. Start on medium speed until you see soft peaks forming, then gradually add the rest of your sugar. Keep whisking until the peaks are stiff and glossy. You’ll know they’re ready when you can turn the bowl upside down and nothing moves. Don’t skip this step or rush it. Those egg whites are what make this one bowl chocolate cake recipe so light and airy.
Step 6: Pour your cooled chocolate mixture into the bowl with the egg yolks. Give it a gentle stir to combine. Then here’s the trick: add two big spoonfuls of the whipped egg whites and stir them in vigorously. This is your sacrificial spoonful. You’re lightening up the chocolate mixture so it’ll be easier to fold in the rest of the whites without deflating them.
Step 7: Now comes the gentle part. Add the rest of the egg whites to the chocolate mixture and fold them in carefully. Use a spatula and cut down through the middle, scrape along the bottom, and bring it up over the top. Turn the bowl a quarter turn and repeat. Keep going until you don’t see any white streaks, but don’t overmix. You want to keep all that air you just whipped in.
Step 8: Pour two thirds of your batter into the prepared pan. Eyeball it, don’t stress about being exact. Slide it into the oven for 25 minutes. You’re looking for it to be puffed up and a skewer to come out clean. While that’s baking, pour the remaining third of batter into a bowl and stick it in the fridge. You’ll need it later.
Step 9: When the cake comes out of the oven, let it cool completely in the pan. It might sink or collapse in the middle and that’s totally fine. Don’t panic! I promise this is normal for flourless cakes. You’re going to cover it with more batter anyway, so any imperfections will disappear.
Step 10: Once the cake is completely cool, heat your oven back up to 180°C. Take the cake out of the pan and put it on a baking sheet lined with parchment. Grab your chilled batter from the fridge. It’ll be thick and firm, so give it a stir to loosen it up. Then spread it over the top of your cooled cake. You can pour it if it’s loose enough, or use a spatula to spread it evenly.
Step 11: Bake for 10 to 15 minutes. You want to see a thin crust form on top, but when you give the pan a gentle shake, the middle should still jiggle. That’s the magic right there. That jiggle means you’ve got that molten center that makes this milk chocolate cake recipe so incredible. Take it out and let it sit for 10 minutes before cutting into it. Serve it warm with ice cream or cream, or let it cool completely and chill it in the fridge for a completely different but equally amazing experience.
5) Tips for Making Moelleux au Chocolat
Don’t stress about the collapse. I’m going to say this again because it’s important. When your first layer comes out of the oven and cools, it might sink dramatically in the middle. The first time this happened to me, I almost cried. I thought I’d ruined it. But then I remembered you’re adding more batter on top, and suddenly it all made sense. The collapse doesn’t matter at all. In fact, it creates a little well for that second layer of batter to nestle into.
Use room temperature eggs if you can remember. I’ll be honest, I forget this step half the time and the cake still turns out great. But if you do remember to take your eggs out of the fridge an hour before baking, the egg whites will whip up to bigger, fluffier peaks. Cold eggs work too, they just take a bit longer to whip. Don’t let this stop you from making the cake if your eggs are cold.
Clean equipment is everything for whipping egg whites. Even a tiny bit of grease or egg yolk will prevent the whites from reaching stiff peaks. I always wipe down my bowl and whisk with a bit of white vinegar on a paper towel before I start. It takes two seconds and guarantees success. If you do accidentally get a bit of yolk in your whites, use the eggshell to scoop it out. The shell acts like a magnet for the yolk.
Check your oven temperature. Most home ovens run hot or cold by at least 25 degrees. If you have an oven thermometer, use it. If not, just keep an eye on your cake during the first bake. If it’s browning too fast on top, your oven runs hot. Cover it loosely with foil. If it’s taking forever to set, your oven runs cold. Give it a few extra minutes. Every oven is different, and you’ll get to know yours over time.
Don’t open the oven door constantly. I know it’s tempting to check on your cake every five minutes, but every time you open that door, the temperature drops. For the first bake, don’t open the oven until at least 20 minutes have passed. For the second bake, you can check at 10 minutes to see how that crust is forming. But resist the urge to poke at it too much. Trust the process.
6) Making Moelleux au Chocolat Ahead of Time
This cake is actually perfect for making ahead, which makes it ideal for entertaining. I usually bake the bottom layer the night before I’m having people over. Once it’s cooled completely, I just leave it in the pan, cover it with plastic wrap, and stick it in the fridge. The next day, all I have to do is spread on the remaining batter and bake it for those final 10 to 15 minutes. The whole second part takes less than half an hour from start to finish.
The chilled batter gets pretty thick in the fridge, almost like frosting. This is totally normal and actually makes it easier to spread evenly over the cake. Just give it a good stir before you spread it, maybe even beat it with a spoon for a minute to loosen it up. If it seems impossibly stiff, let it sit at room temperature for 10 minutes. You want it spreadable but not runny.
You can keep that bottom layer in the fridge for up to two days before adding the top layer. Any longer and the cake might dry out a bit. The reserved batter keeps perfectly in the fridge for the same amount of time. Just make sure you’ve got it in a covered container so it doesn’t pick up any weird fridge smells or form a skin on top.
If you’re really organized, you can bake the whole thing, let it cool, and serve it chilled. It transforms into something completely different. The bottom becomes super fudgy like a brownie, and the top sets into this creamy chocolate mousse texture. I’ve had guests argue about whether they prefer it warm or cold. Both ways are fantastic. It just depends on what you’re in the mood for.
7) Storing Leftover Moelleux au Chocolat
Leftovers keep beautifully in the fridge for up to three days. Just cover the cake tightly with plastic wrap or transfer slices to an airtight container. The texture changes as it chills, but in a good way. That molten center firms up into this incredible fudgy layer. The whole cake becomes denser and richer. I actually think it might be even better the next day when all the flavors have had time to meld together.
You can eat it straight from the fridge, which is how I usually do it. There’s something about cold chocolate cake at midnight that just hits different. But if you want to recreate that warm, gooey experience, pop a slice in the microwave for 20 to 30 seconds. Not too long or the chocolate will get scorching hot. Just enough to warm it through and soften that center again.
I don’t recommend freezing this cake. The texture of the egg whites doesn’t hold up well to freezing and thawing. You’ll end up with something watery and sad. But honestly, with how delicious this cake is, you’re not going to have leftovers long enough to need to freeze them anyway. My family devours this cake within a day or two every single time I make it.
If you’re taking this to a potluck or party, keep it chilled until you’re ready to serve. It travels well as long as you’re careful not to jostle it too much. Transport it in the springform pan with the sides still on for extra protection. You can remove the sides right before serving and use a spatula to slide it onto a prettier serving plate if you want to get fancy.
8) Try these Desserts next!


9) Moelleux au Chocolat
Chocolate Cake Recipe: Moelleux au Chocolat (Best Ever!)
Ingredients
For the Cake
- 225g unsalted butter, cut into cubes (plus extra for greasing the pan)
- 225g good quality 70% dark chocolate, roughly chopped
- 75g cocoa powder (unsweetened)
- Pinch of salt
- 7 large eggs
- 265g caster sugar
To Serve
- Double cream, vanilla ice cream, or custard
- Fresh berries (optional)
Instructions
- Preheat your oven to 180°C (fan) or 355°F. Generously butter a 23cm (9-inch) round springform tin and line the bottom with parchment paper.
- Melt the butter and chopped chocolate together. You can do this in the microwave in 30-second bursts, stirring each time, or use a heatproof bowl over simmering water. Just make sure the bowl doesn’t touch the water.
- Once melted and smooth, sift in the cocoa powder and salt. Stir until everything’s combined and glossy. Set this aside.
- Separate your eggs. Put the whites in a stand mixer bowl (or a large bowl if using an electric whisk) and the yolks in another large bowl.
- Add 135g of the caster sugar to the egg yolks. Whisk with an electric whisk for about 2 minutes until the mixture is pale, thick, and fluffy.
- Now whisk the egg whites until you get soft peaks. Gradually add the remaining 130g sugar and keep whisking until you have stiff, glossy peaks.
- Pour the chocolate mixture into the egg yolk mixture and stir gently to combine.
- Add two big spoonfuls of the whisked egg whites into the chocolate mixture and stir vigorously. Don’t worry about being gentle here. This is your sacrificial spoonful that helps lighten the mixture.
- Now gently fold in the rest of the egg whites, being super careful to keep all that air you just whisked in. No more egg white streaks should be visible.
- Pour two thirds of the batter into your prepared tin. Pop it in the oven for 25 minutes, or until it’s risen and puffy and a skewer comes out clean.
- While that’s baking, pour the remaining third of batter into a bowl. Cover it and stick it in the fridge.
- When the cake is done, take it out and let it cool completely in the tin. It might sink or collapse a bit and that’s totally normal. Don’t panic!
- Once the cake is completely cool, preheat your oven again to 180°C (fan). Line a baking tray with parchment paper.
- Remove the cake from the tin and place it on the prepared baking tray. Take your chilled batter and spread it over the top of the cooled cake. If it’s been in the fridge a while, give it a quick stir to loosen it up first.
- Bake for 10 to 15 minutes. You’re looking for a thin crust on top, but the middle should still be soft and jiggly underneath.
- Let it sit for 10 minutes after baking, then slice and serve warm with your choice of cream, ice cream, or custard. Or let it chill completely in the fridge for a different but equally amazing texture.
10) Nutrition
Serving Size: 1 slice (1/8 of cake), Calories: 574, Sugar: 40 g, Sodium: 66 mg, Fat: 40 g, Saturated Fat: 23 g, Carbohydrates: 52 g, Fiber: 7 g, Protein: 9 g, Cholesterol: 205 mg


Leave a Comment