
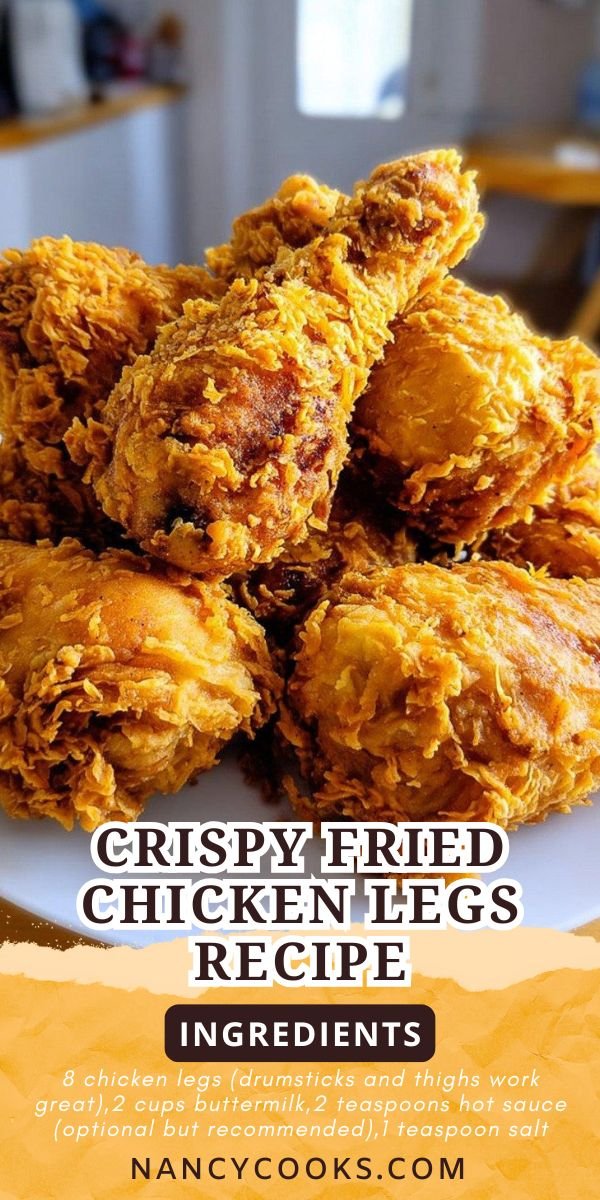
This fried chicken legs recipe brings back memories of Sunday dinners at my grandma’s house. You know that moment when the first bite of perfectly golden chicken hits your tongue and you close your eyes? That’s what we’re making today. I’ve tried every method out there from air fryer recipes chicken to bbq chicken legs crockpot, and even all the baked chicken and baked chicken breast recipes I could find. But nothing beats a proper fried chicken recipe southern style when you want that crunch. This crispy fried chicken comes out juicy inside with a coating that actually stays put. What makes this different? I let the chicken soak in buttermilk overnight. Sounds fancy, but it’s just chicken sitting in a bowl in your fridge while you sleep. The next day, you coat it twice and fry it up. My kids fight over the drumsticks now, and my husband claims I’m hiding a secret southern grandmother somewhere in our closet. The spice blend here is something I’ve tweaked over maybe a hundred batches. Sometimes I’d get it too salty, other times too bland. But this version? It’s the one that made my neighbor ask if I was opening a restaurant. No restaurant, just really good fried chicken that makes people happy.
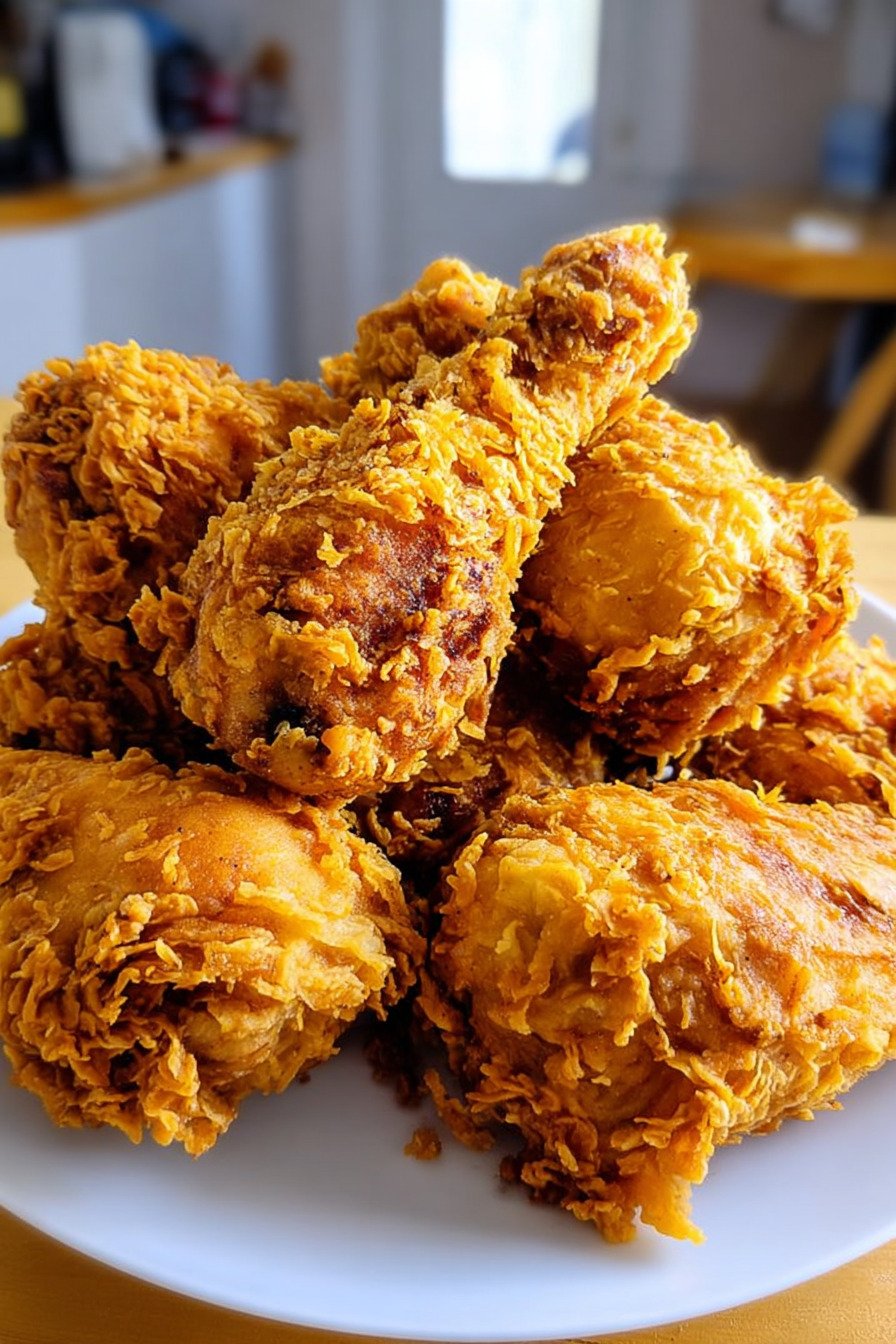
Table of Contents
- 1) Key Takeaways
- 2) Easy Nancy’s Secret Fried Chicken Legs Recipe
- 3) Ingredients for Nancy’s Secret Fried Chicken Legs
- 4) How to Make Nancy’s Secret Fried Chicken Legs
- 5) Tips for Making Nancy’s Secret Fried Chicken Legs
- 6) Making Nancy’s Secret Fried Chicken Legs Ahead of Time
- 7) Storing Leftover Nancy’s Secret Fried Chicken Legs
- 8) Try these Main Dish next!
- 9) Nancy’s Secret Fried Chicken Legs
- 10) Nutrition
1) Key Takeaways
- What makes this fried chicken legs recipe so crispy?
- Can you make fried chicken legs in an air fryer?
- Should you marinate chicken legs before frying?
- What temperature oil do you need for perfect fried chicken?
- How long does it take to fry chicken legs?
2) Easy Nancy’s Secret Fried Chicken Legs Recipe
Look, I’m gonna be straight with you. This fried chicken legs recipe changed my weeknight dinners forever. When I first tried making fried chicken legs recipe at home, I thought it would be complicated or messy. Turns out, I was wrong on both counts. Once you get the hang of the double coating technique, you’ll wonder why you ever bothered with takeout.
My kitchen isn’t fancy. I don’t have professional equipment or a deep fryer that costs more than my rent. Just a regular pot, some oil, and a meat thermometer I picked up at the grocery store. That’s all you need to make chicken that rivals any restaurant. The secret is in the buttermilk soak and that second coat of flour. Sounds simple, right? That’s what makes this recipe so good.
I started making this recipe when my kids complained about dry chicken. You know how kids are. They’ll eat chicken nuggets all day but turn their noses up at anything that looks remotely homemade. This crispy fried chicken won them over on the first try. Now they request it every Sunday, and I’m pretty sure my daughter tells her friends I’m some kind of chicken wizard.
What sets this apart from other recipes? The marinade does half the work while you sleep. You literally just mix buttermilk and chicken in a bowl, cover it, and go watch TV. Tomorrow, you fry it up. No babysitting, no constant checking. Just set it and forget it until dinner time rolls around. My kind of cooking.

3) Ingredients for Nancy’s Secret Fried Chicken Legs
Chicken Legs: Get eight good-sized drumsticks and thighs from your butcher or grocery store. I like a mix of both because drumsticks are great for kids and thighs have more meat for the adults. Fresh chicken works best, but if you only have frozen, just thaw them completely in the fridge overnight. No shortcuts here or you’ll end up with chicken that’s frozen inside and burnt outside.
Buttermilk: This is where the magic happens. Buttermilk has acids that break down the proteins in chicken, making it super tender. Plus it adds this tangy flavor that complements the spices perfectly. Don’t have buttermilk? Mix regular milk with vinegar or lemon juice and let it sit for ten minutes. Works just as well, and I’ve done it more times than I can count when I forget to buy buttermilk.
Hot Sauce: Just a couple teaspoons in the marinade adds depth without making things spicy. I use Frank’s RedHot, but any Louisiana-style hot sauce works. If you’re really sensitive to heat, leave it out. Your chicken will still be great. If you love heat like my husband does, double it. He actually triples it and eats it with a glass of milk nearby.
All-Purpose Flour: The backbone of your crispy coating. You want regular white flour here, not self-rising or bread flour. Those have different protein contents and won’t give you the same crunch. I buy the big five-pound bags because I make this recipe so often now.
Salt and Black Pepper: Basic seasonings that you absolutely cannot skip. I use kosher salt because the larger crystals distribute better in the flour. Fresh cracked black pepper tastes so much better than pre-ground, but use what you have. The difference is noticeable but not deal-breaking if you only have the pre-ground stuff.
Paprika: Gives your chicken that beautiful reddish-golden color you see on professional fried chicken. Sweet paprika is what I use, but smoked paprika adds an interesting depth if you’re feeling adventurous. My neighbor swears by smoked paprika and her chicken always looks like it came from a smokehouse.
Garlic Powder and Onion Powder: These two work together like peanut butter and jelly. Garlic powder gives you that savory punch and onion powder adds sweetness. Don’t use garlic salt or onion salt by accident. I did that once and my chicken tasted like a salt lick. Learn from my mistakes.
Dried Thyme and Basil: These herbs bring the whole flavor profile together. They’re subtle but when they’re missing, you notice. I keep both in my spice drawer and they last forever. Fresh herbs don’t work as well here because they burn in the hot oil. Stick with dried for frying.
Cayenne Pepper: Just half a teaspoon gives you a gentle warmth in the background. Not enough to call it spicy, just enough to make people ask “what’s that flavor?” If you want actual heat, bump it up. I have one friend who uses a full tablespoon and sweats through dinner, but he loves it.
Eggs: Room temperature eggs work better than cold ones. They mix smoother and coat the chicken more evenly. I take mine out of the fridge when I start prepping everything else. By the time I’m ready to coat the chicken, they’re perfect. Two eggs is enough for eight pieces, maybe three if your chicken pieces are huge.
Vegetable Oil: Get the cheap stuff. This isn’t the time for fancy olive oil or expensive avocado oil. Plain vegetable oil, canola oil, or peanut oil all work great for frying. You need enough to come up at least three inches in your pot. I usually go through about two quarts per batch, and yes, you can strain it and reuse it once or twice if you want.
4) How to Make Nancy’s Secret Fried Chicken Legs
Step 1: Marinate Your Chicken: Mix the buttermilk, hot sauce, and a teaspoon of salt in a big bowl. I use a glass bowl but plastic works too. Toss in your chicken legs and make sure every piece is covered in that buttermilk mixture. Some people use a ziplock bag for this, which works great if you’re tight on fridge space. Cover your bowl with plastic wrap and stick it in the fridge. Four hours minimum, but overnight is when the real magic happens. I usually start this in the morning if I’m cooking for dinner, or the night before if I’m planning a lunch.
Step 2: Let Chicken Come to Room Temperature: About half an hour before you’re ready to fry, pull that chicken out of the fridge. Cold chicken hitting hot oil is a recipe for disaster. The outside cooks too fast and the inside stays raw. I learned this the hard way during my first attempt at fried chicken. Set your chicken on the counter, still in its marinade, and let it warm up. This is a good time to set up your coating station too.
Step 3: Prepare Your Coating Station: Get two shallow dishes ready. In one, whisk together all your flour and spices. Mix it really well so every scoop has garlic powder, paprika, all of it. In the other dish, beat your eggs until they’re smooth. No lumps, just smooth beaten eggs. I set these up assembly-line style with the chicken on one end and a wire rack on the other. Makes the whole process flow better.
Step 4: Double Coat Each Piece: Here’s where the magic happens. Take a piece of chicken from the buttermilk and let the excess drip off for a second. Dip it in the beaten egg, turning to coat all sides. Then press it into the flour mixture. Really press it in there so it sticks. Now here’s the secret, do it again. Back in the egg, back in the flour. This double coating is what gives you that extra thick, extra crispy crust that people go crazy for. Trust me on this one.
Step 5: Rest the Coated Chicken: Set each double-coated piece on a wire rack and let them sit for about fifteen minutes. I know you want to fry them right away, but this resting time lets the coating set up and stick to the chicken better. Without this step, your coating might slide off in the oil. I use this time to heat up my oil and clean up the coating station mess.
Step 6: Heat Your Oil: Pour oil into a heavy pot or Dutch oven until it’s about three inches deep. Dutch ovens hold heat really well, which is perfect for frying. Set your burner to medium-high and clip a thermometer to the side of the pot. You’re aiming for 350°F. This takes about ten minutes. Don’t try to guess the temperature. I tried that once and ended up with burnt chicken on the outside and raw chicken on the inside. Just use a thermometer.
Step 7: Fry in Batches: Once your oil hits 350°F, carefully lower three or four pieces of chicken into the pot using tongs. Don’t drop them or the oil will splash. Don’t crowd the pot either or the temperature drops and you get greasy chicken instead of crispy chicken. Set a timer for twelve minutes. Flip the pieces halfway through using your tongs. You want a deep golden brown color all over.
Step 8: Check for Doneness: After twelve to fifteen minutes, pull out your meat thermometer and check the thickest piece. You’re looking for 165°F in the center. If it’s not there yet, give it another minute or two. Better safe than sorry with chicken. Once it hits 165°F, pull all the pieces out and set them on a wire rack or paper towels to drain. That sizzling sound when they come out? That’s the sound of success.
Step 9: Keep Chicken Warm While Frying Remaining Batches: If you’re frying multiple batches, keep the finished chicken warm in a 200°F oven. Put them on a wire rack on a baking sheet so air circulates and they stay crispy. Don’t stack them or cover them with foil. That traps steam and makes them soggy. Been there, done that, learned my lesson.
Step 10: Rest Before Serving: Let your fried chicken rest for five minutes before digging in. I know this is the hardest part. That chicken looks so good and smells amazing. But those five minutes let the juices redistribute throughout the meat and the crust firms up even more. Makes a huge difference in the final texture. Pour yourself a drink, set the table, and resist the urge to sneak a piece early.
5) Tips for Making Nancy’s Secret Fried Chicken Legs
Get yourself a good thermometer. I can’t stress this enough. The difference between greasy chicken and crispy chicken is about twenty degrees. Too hot and your coating burns before the chicken cooks through. Too cold and the chicken absorbs oil like a sponge. I bought a cheap digital thermometer at the grocery store and it’s been my best friend for three years now. Worth every penny.
Don’t skip the resting time after coating. I know I mentioned it already, but people skip this step all the time and then wonder why their coating falls off. Those fifteen minutes let the flour and egg mixture bond together and stick to the chicken. I use this time to clean up my workspace or prep side dishes. Makes the whole cooking process feel less rushed.
Fry in small batches even if it takes longer. I learned this the hard way when I tried to fry eight pieces at once for a dinner party. The oil temperature dropped so much that I ended up with chicken that was more greasy than crispy. Now I do three or four pieces max per batch. Takes longer, yes, but the results are worth the wait. Your guests won’t mind waiting an extra ten minutes when they taste the final product.
Use a heavy pot for frying. Thin pots don’t hold heat well and your oil temperature will swing wildly. Dutch ovens are perfect for this. Cast iron works great too. I inherited my Dutch oven from my grandmother and it’s still going strong. The thick walls keep the temperature steady even when you add cold chicken to hot oil.
Save your used oil if you want. Let it cool completely, strain it through a fine-mesh strainer or coffee filter to remove any bits, and store it in a sealed container. You can use it one or two more times for frying. After that, it starts to break down and give your food a weird taste. I usually use it twice and then toss it. Makes the whole process a bit more economical.
Season your chicken right after frying if you want extra flavor. A light sprinkle of salt while the chicken is still hot and glistening makes a big difference. The salt sticks to the oil and adds that final punch of flavor. Some people like to brush their fried chicken with melted butter and hot sauce right after frying. Not traditional, but it’s really good if you like things spicy and rich.
6) Making Nancy’s Secret Fried Chicken Legs Ahead of Time
The marinade is actually better when you do it the night before. That extra time in the buttermilk makes the chicken so tender it almost falls off the bone. I usually prep my chicken Thursday night if I’m making it for a Friday dinner. Takes two minutes to mix the buttermilk and toss in the chicken, then into the fridge it goes. Next day, I just coat and fry. Makes dinner prep so much faster.
You can prep your flour mixture ahead of time too. Mix all your spices with the flour and store it in an airtight container for up to a week. I make double batches and keep the extra in a mason jar. That way, when the craving for air fryer recipes chicken or fried chicken hits, I’m halfway done before I even start. Saves time and means I’m more likely to actually make it instead of ordering takeout.
Some people ask if you can fry the chicken ahead and reheat it. You can, but fresh is always better. If you need to, fry your chicken a few hours early and keep it warm in a 200°F oven. Don’t refrigerate fried chicken and then try to reheat it. The texture changes and it’s never quite the same. I learned this planning a picnic once. The chicken was fine, but not amazing like it is fresh from the fryer.
For meal prep, you can coat your chicken pieces and freeze them raw. Lay them on a baking sheet in a single layer, freeze until solid, then transfer to freezer bags. When you’re ready to cook, thaw them in the fridge overnight and fry as normal. I do this when chicken legs go on sale. Stock up, coat a bunch, freeze them, and have fried chicken ready to go whenever the mood strikes. Game changer for busy weeks.
7) Storing Leftover Nancy’s Secret Fried Chicken Legs
If you somehow have leftover fried chicken, store it in an airtight container in the fridge. It’ll keep for three days, maybe four if you’re lucky. Don’t leave it sitting out on the counter overnight. Food safety and all that. I stack mine between layers of paper towels to absorb any excess oil. Keeps them from getting too soggy in the fridge.
Reheating fried chicken is an art. Skip the microwave unless you want sad, soggy chicken. Your best bet is the oven or an air fryer at 375°F for about ten minutes. The air fryer is actually perfect for this. Brings back almost all the crispiness. My kids can barely tell the difference between fresh and reheated when I use the air fryer. Just don’t overcrowd the basket or stack the pieces.
Cold fried chicken is delicious too. Don’t knock it until you try it. My husband takes cold fried chicken legs in his lunch all the time. Says it’s better than any sandwich he could make. Pack it with some potato salad or coleslaw and you’ve got yourself a great lunch. No reheating required, which is perfect if you don’t have access to a microwave at work.
You can also pick the meat off leftover chicken and use it in other dishes. Chop it up for salads, tacos, or sandwiches. The breading adds extra flavor and texture. I’ve made chicken salad with leftover fried chicken and it was amazing. Way better than starting with plain grilled chicken. Waste not, want not, right? That’s what my mom always said and she was right about most things.
8) Try these Main Dish next!


9) Nancy’s Secret Fried Chicken Legs
Fried Chicken Legs Recipe That’ll Make You Famous
Ingredients
For the Marinade
- 8 chicken legs (drumsticks and thighs work great)
- 2 cups buttermilk
- 2 teaspoons hot sauce (optional but recommended)
- 1 teaspoon salt
For the Coating
- 2½ cups all-purpose flour
- 1 tablespoon salt
- 1 tablespoon black pepper
- 1 tablespoon paprika
- 1 teaspoon garlic powder
- 1 teaspoon onion powder
- 1 teaspoon dried thyme
- 1 teaspoon dried basil
- ½ teaspoon cayenne pepper
- 2 eggs, beaten
- Vegetable oil for frying (about 2 quarts)
Instructions
Marinating
- Mix buttermilk, hot sauce, and salt in a large bowl. Toss in your chicken legs and make sure they’re all covered. Cover the bowl with plastic wrap and stick it in the fridge for at least 4 hours. Overnight is better if you can wait that long.
- Pull the chicken out about 30 minutes before you’re ready to fry. Cold chicken hitting hot oil is a recipe for uneven cooking.
Preparing the Coating
- In a big shallow dish, whisk together the flour and all your spices. Really mix it well so you get spices in every bite.
- Beat those eggs in a separate bowl until they’re nice and smooth.
Coating the Chicken
- Take each piece of chicken from the buttermilk and let the excess drip off. Dip it in the beaten egg, then press it into the flour mixture. Make sure you get flour everywhere.
- Now here’s the secret: dip it back in the egg, then back in the flour. This double coating is what gives you that extra thick, extra crispy crust.
- Set the coated pieces on a wire rack and let them sit for about 15 minutes. This helps the coating stick better when it hits the oil.
Frying
- Pour your oil into a heavy pot or Dutch oven until it’s about 3 inches deep. Heat it to 350°F. Use a thermometer because guessing gets you greasy chicken.
- Carefully lower 3-4 pieces into the hot oil. Don’t crowd them or the temperature drops and you end up with soggy coating.
- Fry for 12-15 minutes, turning them once halfway through. You want a deep golden brown color and an internal temperature of 165°F.
- Pull them out with tongs and set them on paper towels or a wire rack. Let them rest for 5 minutes before you dig in. I know it’s hard to wait, but that resting time lets the juices settle and the crust firms up even more.
10) Nutrition
Serving Size: 1 chicken leg | Calories: 385 | Sugar: 2.1 g | Sodium: 742 mg | Fat: 22.3 g | Saturated Fat: 5.2 g | Carbohydrates: 24.8 g | Fiber: 1.4 g | Protein: 24.6 g | Cholesterol: 118 mg


Leave a Comment