
Okay, can we talk about fall baking for a second? There’s something magical that happens when apples meet cinnamon in your kitchen. These scones are what I make when I want my house to smell like a cozy bakery without spending hours in front of the oven. I stumbled onto this scones recipe last September when I had way too many apples from the farmers market. You know that moment when you realize your fruit bowl is overflowing? Yeah, that was me. Turns out, grating fresh apples into scone dough creates these pockets of juicy sweetness that make every bite feel like a warm hug. The cinnamon scones recipe easy technique here means you can whip these up before your morning coffee kicks in. What makes this apple scones recipe easy is the grated butter trick. I freeze my butter stick, then run it over a box grater straight into the flour. Game changer! No fancy pastry cutter needed. The result? Flaky, tender scones that rival any bakery. I’ve been told they’re better than fresh apple cake, and honestly, I’m not arguing. If you’re into trying new things, this works beautifully with the same method as a cheese scones recipe, just swap the cheese for apples. Trust me on this one. These fresh apple recipes easy enough for a Tuesday morning but impressive enough for brunch guests.
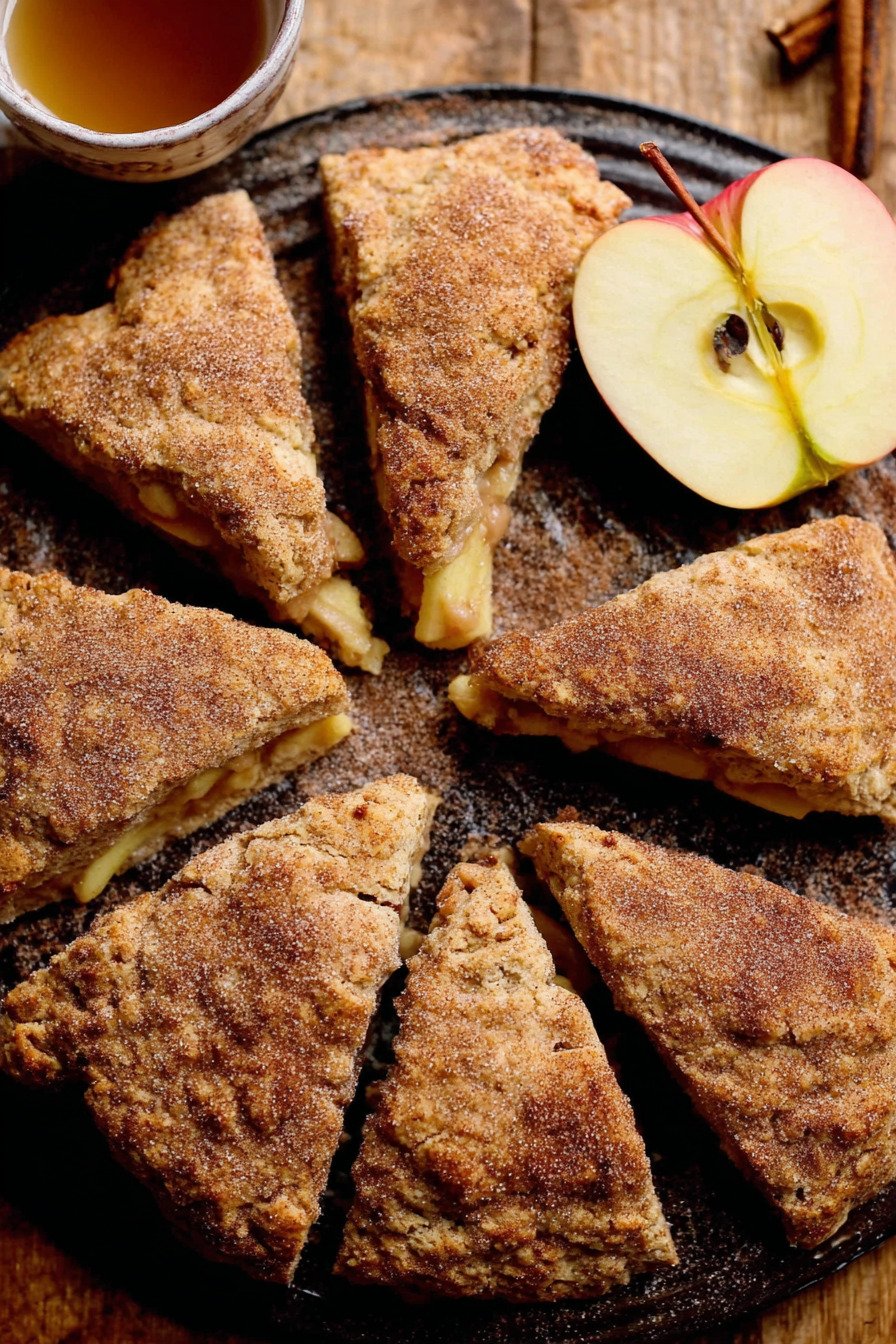
Table of Contents
- 1) Key Takeaways
- 2) Easy Apple Cinnamon Scones Recipe
- 3) Ingredients for Apple Cinnamon Scones
- 4) How to Make Apple Cinnamon Scones
- 5) Tips for Making Apple Cinnamon Scones
- 6) Making Apple Cinnamon Scones Ahead of Time
- 7) Storing Leftover Apple Cinnamon Scones
- 8) Try these Breakfast recipes next!
- 9) Apple Cinnamon Scones
- 10) Nutrition
1) Key Takeaways
- What makes apple cinnamon scones so tender and flaky?
- Can you freeze scone dough before baking?
- Why do you need to chill the dough for scones?
- What’s the best type of apple to use in scones?
- How do you keep scones from getting too dry?
2) Easy Apple Cinnamon Scones Recipe
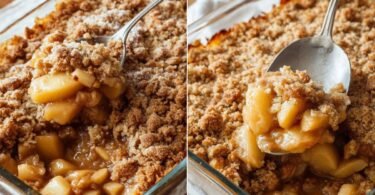
Listen, I’ve tried a lot of scones recipes over the years, and most of them fall into one of two camps. They’re either so dry they could double as doorstops, or they’re weirdly cake-like and missing that classic scone texture we all crave. This scones recipe hits the sweet spot right in the middle. You get tender, flaky layers that break apart in your hands, pockets of juicy apple throughout, and that warm cinnamon sugar coating on top that gets all crackly when it bakes.
What I love most about this recipe is how forgiving it is. You don’t need to be a pastry chef or own any fancy equipment. I literally make these with a box grater, a mixing bowl, and my hands. The grated butter technique might sound weird if you’ve never tried it before, but trust me, it’s a total revelation. No cutting butter into tiny pieces with a pastry cutter or worrying about whether your chunks are the right size. You just grate frozen butter straight into your flour, and boom, perfect scone dough.
The apples add this incredible moisture that keeps everything tender without making the dough soggy. I grate them right into the mix, skin and all, and they practically melt into these little pockets of sweetness as the scones bake. On mornings when I want something special but don’t have hours to spend in the kitchen, this is what I make. From start to finish, including chill time, you’re looking at about 45 minutes. That’s faster than most coffee cake recipes and way more impressive.
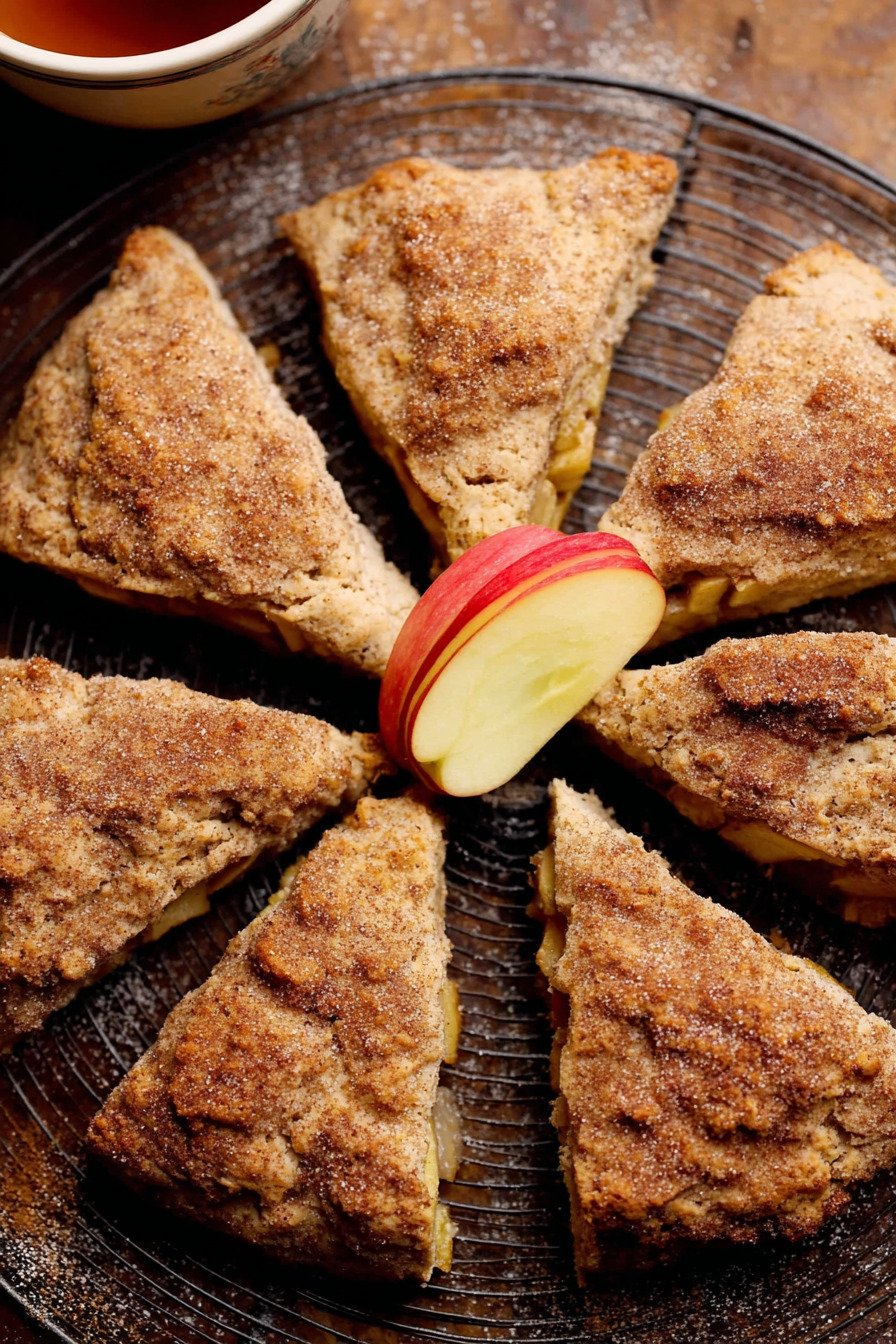
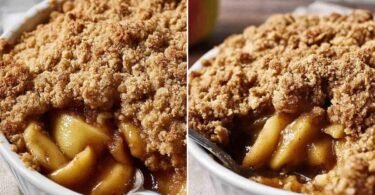
Plus, can we talk about how your kitchen will smell? Cinnamon and apples baking together create this aroma that makes everyone wander into the kitchen asking what’s cooking. I’ve had neighbors knock on my door because the smell wafted out the window. These scones are perfect for weekend brunch, holiday mornings, or any random Tuesday when you need a pick-me-up. Serve them warm with butter, or do what I do and slather them with apple butter for the ultimate fall treat.

3) Ingredients for Apple Cinnamon Scones
Frozen Butter: Here’s where the magic happens. I keep a stick of butter in the freezer just for making scones. When it’s rock solid, you can grate it like cheese, and it creates these perfect little butter shards that melt into flaky layers as the scones bake. Room temperature butter will turn your scones dense and heavy, so don’t skip the freezing step. If you forget to freeze it ahead of time, pop it in the freezer for at least 20 minutes before you start.
Cold Heavy Cream: This is non-negotiable, folks. I know some cinnamon scones recipe easy versions call for milk or buttermilk, but heavy cream is what gives these scones their rich, tender texture. The high fat content keeps everything moist and creates that signature scone crumb. Measure it out and stick it back in the fridge until the very last second. Cold ingredients are your best friend when making scones.
All-Purpose Flour: Regular all-purpose flour works perfectly here. If you have a kitchen scale, use it. Weighing your flour is the number one thing that will level up your baking game. Too much flour makes scones dry and crumbly. Too little and they spread into flat discs. If you’re using measuring cups, fluff the flour first, then spoon it into the cup and level it off. Never scoop directly from the bag or you’ll pack in way too much.
Light Brown Sugar: Brown sugar adds moisture and a subtle molasses flavor that pairs beautifully with the cinnamon and apples. Make sure it’s packed when you measure it. I’ve seen people loosely fill their measuring cups with brown sugar and then wonder why their baked goods taste bland. Press it down firmly until it holds the shape of the cup when you turn it out.
Baking Powder: This is what makes the scones rise and get fluffy. Check the expiration date on your baking powder before using it. Old baking powder loses its oomph and your scones will turn out flat and dense. If you’re not sure if yours is still good, drop a spoonful in some hot water. It should fizz immediately. No fizz? Time to buy new baking powder.
Ground Cinnamon: I go heavy on the cinnamon in this apple scones recipe easy version because it’s the star of the show. If your cinnamon has been sitting in your spice cabinet since 2019, do yourself a favor and get a fresh jar. Old spices lose their flavor and smell like dusty sadness. Fresh cinnamon smells fragrant and slightly spicy. That’s what you want.
Fine Sea Salt: Salt might seem like a boring ingredient, but it’s what makes all the other flavors pop. Without it, your scones will taste flat and one-dimensional. I use fine sea salt because it dissolves easily and distributes evenly through the dough. Regular table salt works too, just don’t use coarse salt or you’ll get random salty bites.
Grated Red Apple: I usually grab Honeycrisp or Gala apples for this recipe. You want something crisp and fresh, not those sad mealy apples that have been sitting in your fruit bowl for three weeks. The apple adds moisture and little bursts of sweetness throughout the scones. Grate it right before you need it so it doesn’t turn brown. Leave the skin on for extra texture and nutrients.
Sparkling Sugar with Cinnamon: This is completely optional, but it’s what takes these scones from good to bakery-level gorgeous. Sparkling sugar is that coarse, crunchy sugar you see on top of fancy muffins and cookies. Mix it with a bit of cinnamon and sprinkle it on top before baking. It creates this beautiful crystallized crust that adds textural interest. If you don’t have sparkling sugar, regular granulated sugar works fine. It just won’t be quite as crunchy.

4) How to Make Apple Cinnamon Scones
Step 1: Get your sheet pan ready by lining it with parchment paper. I keep a roll of parchment in my kitchen at all times because it makes cleanup so much easier. You can also use a silicone baking mat if you have one. Just don’t skip this step or your scones will stick to the pan and you’ll be scraping them off in sad, crumbly pieces.
Step 2: Take your frozen butter out of the freezer and grate it using the large holes on a box grater. Work quickly so it doesn’t start melting in your hands. I like to grate it directly into a small bowl and then pop the whole thing back in the freezer. Some recipes tell you to grate it straight into the flour, but I find having it pre-grated and ready to go makes the whole process smoother. Measure out your heavy cream and stick it in the fridge.
Step 3: Grab a large mixing bowl and toss in your flour, brown sugar, baking powder, cinnamon, and salt. Give it a quick whisk to combine everything evenly. Add your frozen grated butter and use your fingers to toss it through the dry ingredients. You want to coat each little butter shred with flour so they don’t clump together. The mixture should look like coarse crumbs with visible butter pieces throughout.
Step 4: Now for the fun part. Make a well in the center of your flour mixture, like you’re building a flour volcano. Pour your cold cream into the well, then add your freshly grated apples on top. Using a rubber spatula, start folding everything together from the edges toward the center. Don’t stir it like you’re making cake batter. Fold it gently and carefully.
Step 5: Once the dough starts coming together and there are just a few dry patches left, put down the spatula and use your hands. Here’s the technique that changed my scone game forever. Scoop up a handful of dough and let it fall back into the bowl through your fingers, like you’re letting sand run through your hands at the beach. This breaks up any big clumps without overworking the dough. Keep doing this until you don’t see any more dry flour streaks. The dough will look shaggy and a bit rough around the edges. That’s perfect. Cover the bowl and stick it in the fridge for 15 minutes.
Step 6: After the rest time, dump your dough out onto a lightly floured surface. Don’t add too much flour or your scones will be dry. Just enough to keep things from sticking. Gently press the clumps together into an 8-inch circle. I use my hands for this, not a rolling pin. You’re not trying to roll it smooth. You’re just coaxing the dough into a round shape. It should be about an inch thick.
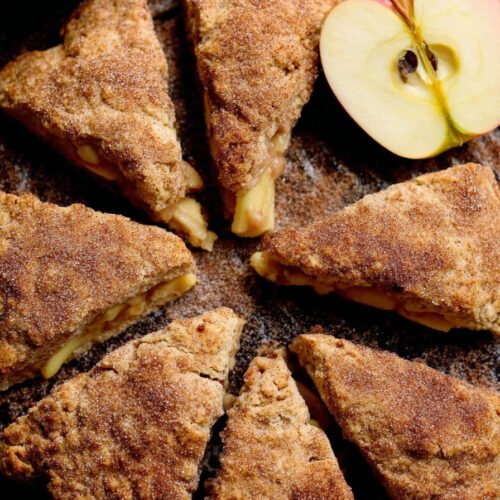
Step 7: Time to cut your scones. I use a bench scraper for this because it makes clean cuts, but a sharp knife works too. Cut the circle into 8 wedges, like you’re cutting a pizza. Dip your knife or scraper in flour between each cut to keep it from sticking. Don’t twist or saw back and forth. Just press straight down and pull straight up. Twisting seals the edges and keeps the scones from rising properly.
Step 8: Transfer each wedge to your prepared baking sheet, spacing them a couple inches apart. Mix your sparkling sugar with cinnamon in a small bowl and sprinkle it generously over the tops. Don’t be shy here. That sugar coating is what makes the tops all crispy and caramelized. Pop the whole tray in the fridge while your oven preheats to 400°F. This extra chill time helps the scones keep their shape and get those defined edges we’re after.
Step 9: Bake for 12 to 20 minutes. I know that’s a big range, but ovens vary wildly. Start checking at 12 minutes. You’re looking for edges and corners that are just starting to turn golden brown. The centers should still look a bit pale and might feel soft to the touch. That’s okay. They’ll firm up as they cool. If you bake them until they’re golden all over, they’ll be too dry.
Step 10: Let the pan cool on a wire rack for at least 5 minutes before you try to move the scones. They’re delicate when they’re hot and will fall apart if you manhandle them too soon. Once they’ve cooled enough to handle, transfer them to the wire rack to cool completely. Or don’t cool them completely. Warm scones split in half with butter melting into all the nooks and crannies? That’s basically heaven.
5) Tips for Making Apple Cinnamon Scones
Keep everything cold, and I mean everything. Your butter should be frozen solid. Your cream should be straight from the fridge. Some people even chill their flour and mixing bowl ahead of time. Cold ingredients are what create those flaky layers. When the cold butter hits the hot oven, it creates steam pockets that make the scones rise and get all those beautiful layers. If your butter is too warm, it just melts into the dough and you end up with dense, flat scones.
Don’t overwork the dough. This is probably the most common mistake people make with scones. The more you handle and knead the dough, the more gluten develops. Gluten is great for chewy bread, but it’s the enemy of tender scones. Mix just until the flour disappears. The dough should look rough and shaggy, not smooth and uniform. If you’re seeing marble-sized chunks of butter throughout, that’s a good sign. Those will melt and create pockets of flakiness.
Use fresh apples that are crisp and firm. Old, mealy apples have too much moisture and will make your dough soggy. I learned this the hard way when I tried using some apples that had been sitting in my fruit bowl for way too long. The dough turned into a sticky mess and the scones came out gummy. Grate the apples right before you need them so they don’t oxidize and turn brown. If you prep them ahead of time, toss them with a tiny bit of lemon juice to keep them fresh looking.
Measure your flour correctly. I’m going to beat this drum until everyone gets a kitchen scale, but seriously, weighing your flour is the single best thing you can do for your baking. A cup of flour can weigh anywhere from 120 to 150 grams depending on how you scoop it. That’s a huge difference. Too much flour makes dry, crumbly scones. If you don’t have a scale, at least use the spoon and level method. Fluff up your flour, spoon it into the measuring cup, and level it off with a knife.
Let the dough rest in the fridge. I know you’re excited and want to bake them right away, but that 15-minute rest makes a real difference. It gives the flour time to hydrate and absorb the liquid, which results in a more cohesive dough. It also chills everything back down after all that handling. Your hands are warm, and even that brief contact can soften the butter. The fridge firms everything back up so you get the best rise and texture.
Watch your oven temperature. Every oven is different, and most home ovens run either hotter or cooler than the dial says. Get an oven thermometer if you don’t have one. They’re cheap and they’ll change your baking life. These scones need a hot oven to rise properly. If your oven runs cool, they’ll spread instead of rise and you’ll end up with hockey pucks. If it runs too hot, the outsides will brown before the insides cook through.
6) Making Apple Cinnamon Scones Ahead of Time
This is one of my favorite things about this fresh apple cake alternative. You can make the dough ahead and have fresh scones whenever you want. After you cut the dough into wedges, arrange them on your parchment-lined baking sheet and pop the whole thing in the freezer. Once they’re frozen solid (this takes about 2 hours), transfer them to a freezer bag or airtight container. They’ll keep for up to 3 months.
When you’re ready to bake, there’s no need to thaw them first. Just pull out however many you want, arrange them on a baking sheet, brush with a bit of cream if you’re feeling fancy, sprinkle with cinnamon sugar, and bake straight from frozen. Add 2 to 5 minutes to the baking time. That’s it. Fresh scones whenever the craving hits, and you don’t even have to wash a mixing bowl. This is what I do every fall. I make a triple batch, freeze them, and then I have scones ready to go for impromptu brunch guests or lazy weekend mornings.
You can also make the dough the night before if you want fresh scones for breakfast without the morning rush. Mix everything up, shape it into a disc, wrap it tightly in plastic wrap, and refrigerate overnight. In the morning, let it sit at room temperature for about 10 minutes so it’s easier to cut, then slice and bake as usual. The overnight rest actually improves the flavor as the ingredients have more time to meld together. Some bakers swear the scones taste even better this way.
If you want to go the full make-ahead route, you can shape, cut, and top the scones with sugar, then refrigerate them on the baking sheet for up to 24 hours before baking. Just cover them loosely with plastic wrap so they don’t dry out. When you’re ready to bake, pull them straight from the fridge to the oven. No need to bring them to room temperature. Cold scones going into a hot oven is exactly what you want for the best rise and texture. This method is perfect for holiday mornings when you want fresh scones but don’t want to spend your morning prep time in the kitchen.
7) Storing Leftover Apple Cinnamon Scones
Real talk though, leftover scones don’t usually last long in my house. But when they do stick around, proper storage makes all the difference. Let them cool completely before storing them. I know it’s tempting to stash them away while they’re still warm, but trapped steam will make them soggy. Once they’ve cooled to room temperature, transfer them to an airtight container. Here’s a little trick I learned from a bakery I used to work at. Toss a paper towel in the bottom of the container. It absorbs any excess moisture and keeps the scones from getting soft and sad.
At room temperature, these scones will stay fresh for 2 to 3 days. After that, they start to dry out. If you live somewhere humid, you might want to refrigerate them instead. The fridge extends their life to about 5 days, but it does dry them out a bit faster. I don’t usually refrigerate mine unless it’s the middle of summer and I’m worried about things going moldy. The slight trade-off in texture isn’t worth it to me most of the time.
To reheat, I pop them in a 350°F oven for about 5 minutes. This crisps up the outside and warms them through without drying them out. You can also microwave them for 15 to 20 seconds, but the texture won’t be quite as good. The microwave makes them a bit chewy instead of tender and flaky. If you’re eating them cold, they’re honestly still pretty great. I’ve been known to grab one on my way out the door for a quick breakfast.
For longer storage, freeze baked scones just like you would freeze the unbaked dough. Wrap each one individually in plastic wrap, then put them all in a freezer bag. They’ll keep for a month or two. Thaw at room temperature or warm them straight from frozen in a 350°F oven for about 10 minutes. They’ll taste almost as good as fresh. I love having a stash of these in the freezer for unexpected guests or when I need a quick breakfast option that’s better than a protein bar.
8) Try these Breakfast recipes next!


9) Apple Cinnamon Scones
Scones Recipe: Fresh Apple Cinnamon Scones with Tender Crumb
Ingredients
- 4 tablespoons unsalted butter, frozen
- 1/2 cup + 1 tablespoon cold heavy cream
- 2 cups all-purpose flour
- 1/4 cup light brown sugar, packed
- 2 3/4 teaspoons baking powder
- 2 teaspoons ground cinnamon
- 3/4 teaspoon fine sea salt
- 1 cup grated red apple (about 1-2 apples)
- 2 tablespoons sparkling sugar or granulated sugar, for topping
- 1/2 teaspoon cinnamon, for mixing with the sugar
Instructions
- Line a sheet pan with parchment paper and set it aside.
- Grate the frozen butter using a box grater and pop it back in the freezer. Measure out your cream and keep it chilled in the fridge until you need it.
- In a large mixing bowl, toss together the flour, brown sugar, baking powder, cinnamon, and salt. Add your frozen grated butter and gently mix it through the dry ingredients.
- Create a well in the center of your flour mixture. Pour in the cold cream and add your grated apples. Using a rubber spatula, fold everything together until it starts to come together. Now here’s the fun part: use your hands to scoop up chunks of dough and let them fall through your fingers. This breaks up clumps without overworking the dough. Keep going until you don’t see any dry flour streaks. Pop the whole bowl in the fridge for 15 minutes.
- After the dough has rested, turn it out onto a lightly floured surface. Gently press the clumps together to form an 8-inch round. Don’t knead it, just coax it into shape.
- Cut the dough into 8 wedges using a bench scraper or sharp knife. Dip your knife in flour between cuts to keep it from sticking.
- Transfer your scone wedges to the prepared baking sheet. Mix your sparkling sugar with cinnamon and sprinkle it generously over the tops. Chill the tray in the fridge while your oven preheats to 400°F.
- Bake for 12 to 20 minutes, until the edges just start turning golden brown. They should still feel a bit soft when you touch them.
- Let the pan cool on a wire rack, then dig in while they’re still warm!
10) Nutrition
Serving Size: 1 scone | Calories: 201 | Sugar: 8 g | Sodium: 367 mg | Fat: 6 g | Saturated Fat: 4 g | Carbohydrates: 34 g | Fiber: 2 g | Protein: 3 g | Cholesterol: 15 mg


Leave a Comment